Showing posts with label pioneer. Show all posts
Friday, June 1, 2018
The Pioneer Handkerchief Doll

Wednesday, May 7, 2014
Favorite Store-Bought Baking Mixes
and What You Can Make with Them...
These hand pies were made with Pioneer Baking Mix. I baked these in the oven with apple pie filling, but they also make great meat pies. So quick and easy! Fill with Sloppy Joe mix and maybe some shredded cheese.
Jiffy Corn Muffin Mix--the first dish I learned to make (in a seasoned iron skillet of course!) I also like using the Jiffy Pizza Crust to make the yummiest bread sticks. You can find a picture of my breadsticks and the recipe here. (Just found this great vegetable side with Jiffy: Corn Pudding.
Krusteaz Pie Crust--Just soooo easy!
Pioneer Baking Mix--light and fluffy, beautiful :-)
Saturday, August 31, 2013
Retro Yo-Yo Quilts
Here's what you can do with all those little bitty pieces of fabric you have left over from sewing projects. It's a yo-yo quilt! Yo-yo quilts became popular during the Great Depression, and I fell in love with them from the first time I saw a yo-yo quilt. Making yo-yos are great because you can take the materials in a little baggy in your purse and sew no matter where you are--even in church (yes, it's true)! You can make pillow covers, table runners, coasters, decoration for a guest towel...the possibilities are endless!
Quilts Can Represent a Lifetime
My throw may not look like much but it means a lot to me because each yo-yo represents an outfit or project I sewed for my family over the last twenty-five years. My original inspiration came from a photo in Better Homes and Gardens (I think?). This clipping is beat up cause it was kept in my idea notebook and referred to often.![]() |
| Probably published in Better Homes and Gardens many moons ago. |
Yo-yos Are Easy to Make
I just kept the quilt in a storage box and added onto it as I had more yo-yos and yo-yo squares completed. I found the instructions for yo-yo quilting in an old craft book from the library, and I'm sorry to say I didn't keep the source info. on the book :( I just made myself plenty of circle patterns out of old manila folders I planned on throwing out. Then I would pin my pattern to leftover scraps of fabric and cut the material out. This can be done assembly style (all the pinning and cutting done at once) so that the yo-yos are ready to be sewn. Make them whatever size you want. Put two yo-yos right sides together and sew a few stitches (whip stitch is fine) to attach them. Use a thread that will not be too obvious. I prefer quilting thread for this project because it is a lot stronger than regular thread.![]() |
| source unknown |
Resurgence in Yo-yo Crafts
Yo-yo quilting has become popular again and Hobby Lobby keeps instructions and durable circle patterns in the hand-sewing isle. Instructions and ideas can be downloaded from their website as well. This is a great beginning sewing activity for youngsters and my children have really enjoyed having something useful to do while watching television or waiting in the doctor's office.
I hope you will try yo-yo quilting too. I invite you to share ways you have used yo-yos in your crafting :)
Labels:
beginning sewing,
create,
gifts,
Girl Scouts,
grandchildren,
hand sewing,
homemade,
pioneer,
quilting,
retro,
sewing,
yo yo quilts,
yo-yo,
yo-yo quilting
Wednesday, July 27, 2011
Pioneer Day Posts
I think the study of American Pioneers (Mormon or otherwise) can help children become interested in their own family heritage. Here is a quick reference for all the posts I did in July along the Pioneer Day Theme.
Tuesday, July 26, 2011
Clove-Studded Fruit
"Aunt Eliza had brought Ma a large red apple stuck full of cloves. How good it smelled! And it would not spoil, for so many cloves would keep it sound and sweet." Little House In The Big Woods, by Laura Ingalls Wilder
Little House In The Big Woods is my most favorite of the Little House books. I love the descriptions given of daily pioneer life. Clove apples are a very simple craft to make with children. They don't have to make a pattern at all, but some will want to and they smell wonderful! They also taste very good too (after cloves have been removed). I found a small bottle of cloves for little more than a dollar at the local store, though they can be quite costly--I had to shop around. The number of cloves per child can be limited if necessary. Handi-wipes would be good to have on hand since the fruit is very juicy.
Press the sharp point of each clove into the apple. Push it in until only the head of the clove shows. you may need a toothpick to help you get started. Continue until the whole apple is covered with cloves, (you can limit the amount of cloves if necessary). To display your apple, place it on a dish or in a bowl out of direct sunlight. You can also make clove oranges and clove lemons the same way you make clove apples. These taste great in hot cider! (instructions from My Little House Party Crafts Book, ISBN 0439060052)
Our family hosted a Library Story Time and we did this fun craft. To see the lesson plan go to my Christmas Traditions, part 3 post.
Monday, July 25, 2011
Old-Timey Button String and Bracelet
This is an appropriate activity for five yr. olds and up. As with all small objects, keep buttons and button strings away from small children. I was given a trunk of beautiful mementos left by a neighbor of my mother's who really had no one left to leave it to. In the trunk was an old-fashioned wicker sewing box and in that was a small collection of buttons (pictured).
Take your collection of buttons and using heavy thread (like quilting thread), 10 inches to 12 inches long--or longer if you wish, and double knot a small button to one end of the thread to keep the other buttons from sliding off. Slide buttons onto the thread which can be stiffened with a few drops of glue (Laura and Mary would have used melted candle wax), or an embroidery needle can be used. When satisfied with the button string, make a double knot after the last button on the string with the end of the thread. Clip the loose end of the thread. ("Baby Carrie's Button String," My Little House Crafts Book ISBN 0439059585)

For a button bracelet, thread needle with about 40 inches of thread and knot ends together. Insert the needle from the back to the front of a white pearl shirt button, leaving a short tail of thread on the back. Then insert the needle from front to back through the hole opposite the first hole as shown in Fig. 1. Knot the thread on back of button to secure. Insert needle through first hole of same button again, add a gold bead and insert needle through second hole as before.
Insert needle from back to front of brown shirt button (or whatever colors you prefer--just have to be shirt buttons). Add a gold 3mm x 6mm gold oval bead and insert needle through second hole of brown button as shown in Fig. 1. (You can skip the gold beads if preferred. My mom's necklace was made with only white pearl buttons). Slide second button up tight to back of first button as shown in Fig. 2.
Continue to add buttons and beads in this way, alternating white and brown buttons so all white buttons are on one side and all brown buttons are on the other side and the right side of each button is topped with a gold bead. Keep thread taut and buttons close together as you work. When bracelet is large enough to fit over your hand, join the ends together and fasten off thread. (I think this came from Reminisce magazine).
Saturday, July 23, 2011
Pioneer Rag Dolls
![]() |
| Christen and Elise's Rag Dolls |
When we were studying about pioneers in our homeschool, we checked out so many books from the various local libraries. I found one book (unfortunately I didn't keep the source), that had crafts for kids. I remember the cover of the book had the cutest plates made from woven bread dough clay colorfully painted with flowers also made from the bread dough clay. Inside were the instructions to make these dolls. The girls were able to make the bowls and they did a great job, but I had to help them make the dolls.
I was in the process of taking pictures of their dolls for this post when Elise fondly reminisced how I had let the girls design their own dolls. They chose the hair color and eye color. Christen added a shawl from the scrap bag and fastened it with a pin from her Grandma Rosie. I designed the little dresses myself keeping them very simple with tiny pin tucks at the neck.
My 15 yr. old son saw these dolls yesterday and rudely proclaimed them ugly :( I said they were of a "primitive design" and were supposed to look like this! In fact I followed the picture in the book freehand exactly as shown. I've always thought they were very sweet and similar to Laura's doll, Charlotte, as described in Little House in the Big Woods, Chapter 4. (I just remembered that my mom made a bunch of these simple rag dolls for a Relief Society fund raiser when I was a little girl)!
Basically, draw a doll figure on packaging paper or freezer paper, then cut out fabric. (The pattern includes the head and the body, separately). You stuff the head through the neck opening of the head, and the body through the neck opening of the body. Once stuffed, sew head and neck together with a whip stitch. (I used a 1/2 inch seam). A knitting needle helped to push the stuffing into the arms and legs, etc. (Becoming Martha has a great rag doll tutorial that would work just as well probably!)
I used yarn in the desired color looping it around about a foot-wide piece of cardboard until it was enough to make a wig. I carefully slipped the yarn off of the cardboard and used the sewing machine to make a seam down the middle of the yarn. Fabric glue is applied to the head to keep the hair onto the doll's head. I used fabric paints to carefully paint a face (lightly sketch it out in pencil first).
I made the dress slightly bigger than the doll's pattern and sewed it together basically the same as the doll's but leaving the bottom of the dress and sleeves open and hemming neck, arms, and sleeves. Even for a novice sewer like me, it was fairly quick and easy and the girls and I were happy with the results since they looked very much like the picture in the book.
Wednesday, July 20, 2011
Pioneer Handkerchief Dolls
"These are the perfect beginner sewing project for Brownie troops or for young 4-H'ers."
In the mid-1980's, when I was a young adult, I liked to go to local arts and crafts festivals. The best one I ever went to was the Watermelon Jubilee in Ft. Deposit (Greenville), Alabama. I bought an ink drawing by a local artist that I eventually framed, and a Handkerchief Doll. I thought it was the most darling thing I ever saw. I really didn't notice much about its construction until I read an article in the July 1992 Friend magazine by Judie Fordham. She actually gave step-by-step instructions on how to make one. This is something I wanted to share with my daughters as part of the many pioneer things I love.
Materials:
Man's large white handkerchief
1-1/4 yards, 1 inch wide colored lace or eyelet
a ruler
a needle and thread the same color as the eyelet or lace
scissors
embroidery needle
pink and blue embroidery thread
stuffing
4 pieces of narrow ribbon 10 inches long
On the opposite edge of the handkerchief, find the midpoint, then measure in 3-1/2 inches.
Embroider a pink French knot for the doll's nose. Make two blue French-knot eyes 1/2 inch above the nose and about 1 inch apart.
Wad up enough stuffing to make a ball 2 inches in diameter. To make the doll's head place the ball of stuffing under the face you just made, gather the handkerchief tightly around it, and tie it off at the bottom with a piece of double thread. Tie a piece of ribbon into a bow over the double thread to make the neck.
Sew two circles of lace around the back of the head for a bonnet. Make arms by rolling the handkerchief at each side of the head and tying in a knot, leaving 1: at each end for hands.
Make three bows out of the ribbon and sew them, equal distances apart, above the lace on the skirt.
The instructions for Handkerchief Dolls is found at the following link:
http://lds.org/friend/1992/07/handkerchief-doll?lang=eng&query=handkerchief+doll
Judie Fordham, "Pioneer Dolls," Friend, July 1992
When pioneer children were crossing the plains,
They didn't have cars, airplanes, or trains.
They walked beside wagons loaded clear to the top
With food, bedding, and seeds for the next season's crop.
There just wasn't room for a toy or a doll--
The wagons were filled with all they could haul.
So Papa's handkerchief became a new toy,
A cherished soft doll that brought lots of joy.
This cute little doll loves to play or just sleep.
She'll brush away tears if ever you weep.
So keep her close by--she's easy to hold--
These instructions come from Kathy Ballard, "Pioneer Dolls 'Sew' Delightful for Small Stitchers," Country Woman, Jan/Feb 1992
Materials Needed (for one large and one small doll):
1/3 yard of white cotton fabric
Scraps of calico for skirts and scarves
Scraps of lace and ribbons for trims
Thread to match fabric
Knit-Cro-Sheen crochet thread or string
Small amount of polyester stuffing for head
Standard sewing supplies
Body: Cut one 8 inch square of white fabric for small doll and one 12 inch square for large doll. To form hands, tie two pieces of string or crochet thread on two adjacent corners about 1/2 inch from ends (see Fig. 1).
Fold top of fabric over so it covers the stuffing completely; gather together under the head and tie with a piece of string (see Fig.2). Pull arms out to each side and arrange, then bunch the rest of the fabric together under the arms and tie with another string (Fig. 2).
Skirt: Cut out a 3 inch x 8 inch piece of calico for small doll and a 6 inch x 12 inch piece for large doll. Hand-sew a gathering thread along one long edge of the skirt.
Pull up gathering thread and place skirt around doll beneath the arms, where the second string is. Stitch top corners of skirt together in the back, securing the skirt to the doll at the same time.
Using two or three small stitches, hand-sew the bottom corners of the skirt together. Trim away any of the white fabric that shows below the skirt.
Hat: Cut a piece of lace that's long enough to fit over the top of the head, and sew it on for a hat brim. Or make a scarf by cutting a 6 inch square for larger doll. Fold fabric in half to form a triangle. Place over doll's head and sew the ends of the scarf together under the chin. Stitch to doll to hold in place.
Angel Wings: For small doll, use a 2 inch wide of flat lace about 18 inches long for a piece of white fabric 2 inches x 18 inches. Tie into a bow with 2 inch to 3 inch streamers and tack to back of doll just below the head.
Trims: If desired, you can use lace to trim around the bottom of the skirt and tie scraps of ribbon around the neck waist or hands of doll.
Monday, July 18, 2011
Children's Pioneer Recipes
Some people disliked the job of churning so much that they invented a dog-driven churn! An ideal way to show children how long and hard adults and children had to work to make butter in the olden days would be to demonstrate an actual butter churn. A good description of churning butter is found in Chapter Two of Little House in the Big Woods, by Laura Ingalls Wilder.
Baby food jars could be used for each child to churn their own butter. Fill each jar 2/3 full of refrigerated heavy cream (not light or half-and-half...it must be heavy!). Fasten jars securely. Shake up and down vigorously. While shaking, or churning, sit in a circle and talk about where the cream came from, and how in the olden days cream would rise to the top of a bottle of milk.
To pass the time while churning, children often used to recite this traditional chant: "Come, butter, come! Come, butter, come! (Peter) standing at the gate. Waiting for a butter cake...Come, butter, come!" Go around the circle, give each child a turn to substitute his or her name in the chant.
Children should then drain off the water into a cup--some adventurous children may enjoy drinking the rich buttermilk. If you find you have more cream than you need for each child's butter jar, use the extra to fill a larger jar 2/3 full, and proceed as above, but stop the process when you reach the whipped cream stage. Serve with fresh berries and a bit of sugar.
"The Olden Days" ("Science World," November 5, 1993)
Homemade Butter
1/2 cup whipping cream
1 tablespoon sour cream
pinch of salt, optional
Put both creams into a jar with a tight-fitting lid; shake vigorously. After a lump of butter forms (about 15 minutes), pour off the remaining liquid (whey). Place the butter on a plate and press it gently with a spoon to remove the remaining liquid. If desired, sprinkle with salt.
Navoo Ginger Cookies
1/2 cup sugar
1/2 cup molasses
1/3 cup oil
1/3 cup water
1 egg
3-1/2 cups flour
1/2 teaspoon baking soda
1/2 teaspoon cinnamon
1/2 teaspoon ginger
1/4 teaspoon salt
In a large bowl, mix together the sugar, molasses, oil, and water. Beat in the egg. In a separate bowl, combine the dry ingredients. Add the dry mixture in three parts to the wet mixture, stirring well after each addition. Shape the dough into 1 inch balls and place them on a greased cookie sheet. Bake at 350 degrees for 8-12 minutes.
Johnnycake
(A favorite dish of the Prophet Joseph Smith)
1 cup cornmeal
1/2 teaspoon baking soda
1 teaspoon cream of tartar
1/4 teaspoon salt
1 egg, beaten
1 cup milk
1/4 cup honey
1 tablespoon molasses
1 tablespoon butter or margarine, melted
Combine the dry ingredients in a large bowl. In a separate bowl, mix together the remaining ingredients. Blend this mixture into the dry ingredients, mixing just enough to combine. Put the batter into a greased 8 inch square pan. Bake at 425 degrees for 25-30 minutes. Serve hot with Homemade Butter.
Old-fashioned Pickles
1 medium onion, thinly sliced
1 large cucumber
1 cup vinegar
2/3 cup water
1/2 cup sugar
1/2 teaspoon salt
pinch of pepper
Put the onion slices into a one-quart glass jar that has a lid. With a fork, scrape down the length of the cucumber; repeat, going all around it. Slice the cucumber and add it to the jar. Combine the remaining ingredients in a bowl, then pour into the jar. Cover the jar and refrigerate for at least 24 hours before serving.
Friday, July 15, 2011
A New Twist On Pioneer Hay Sticks
None of Laura Ingalls Wilder's books were more frightening to me than The Long Winter. (Though the plague of grasshoppers On the Banks of Plum Creek was pretty terrifying!) I could not imagine being cut off from civilization for so long that people became seriously malnourished! Laura's future husband, Almonzo, and his brother fared a little better due to the fact that they had stored a large amount of wheat to plant in the spring. Soon it became apparent that they would have to share with the other townspeople--a perfect example of the necessity of food storage.
In The Long Winter, the coal soon ran out since no train was able to get through the blizzard and Pa ingeniously began to use the hay as fuel that they had stored for their animal's food to last throughout the winter. "Here is your breakfast fuel, Caroline," Pa said, laying his armful down by the stove. "Good hard sticks of hay. I guess they will burn all right."
Laura was a big help making the hay sticks with her father who was soon becoming seriously discouraged about their predicament. My Little House Crafts Book 0439059585 is a fun little book of crafts that Laura describes in her Little House series. The book shares how the hay sticks were made. However, I chose to share a similar craft that we can more easily make and use today.
I found this idea in an issue of Martha Stewart Living magazine. Simply reuse newspapers to make firestarters. "Tightly roll a sheet of newspaper, bend it in half, twist the ends together, and fasten with twine. Keep a basketful by the hearth and you'll always be ready to heat things up." These are very similar to the hay sticks that Laura and her pa made.
Thursday, July 14, 2011
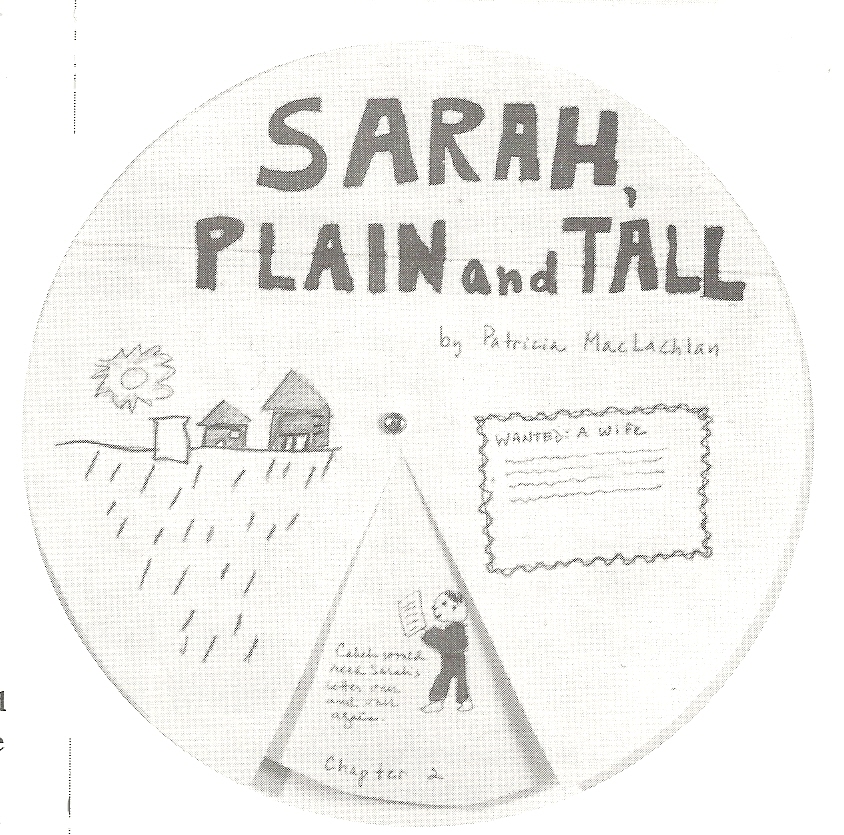
Book Review: Sarah, Plain and Tall
![]() |
| ISBN 0618062416 |
Many would probably feel that doing a book review with 16, 8-11 year old girls as a weekly church activity would be going above and beyond. However, I was familiar with a really good resource (listed below) that I was using with my older children to study Newbery Award winning books (I'm picky about these because some are just down-right depressing!) This made planning a series of book-review activities relatively painless. Not all the girls were on board, however, since reading was involved. This book could be read in one sitting by an 11 yr. old. The younger girls and their moms were more receptive!
We actually did the above pictured chapter review and I think we watched the movie. The book was covered over 3-4 weeks. You may not be able to do all the activities in a weekly environment--I chose the ones that would fit our group of girls the best. But homeschoolers and teachers of this age-group might want to try all of the activities. I also highly recommend the Kirsten series and teacher's guide. My younger daughter and I really enjoyed doing these activities together.
Kirsten 1854 Teacher's Guide to Six Books About Pioneer America, Peg Hall 1562472364
Teaching With Favorite Newbery Books, Lori Licciardo-Musso ISBN 0590019759
Tuesday, July 12, 2011
Pioneer Children
by Sandy Halvorson
http://lds.org/friend/1983/07/i-think-of-pioneers?lang=eng
Sometimes when I must walk to school, it seems a long, long way.
I get to feeling tired and would like to stop and play.
But then I think of pioneers who walked by sun and star;
And suddenly my little walk doesn’t seem so far.
Sometimes on cold, dark winter nights I crawl beneath the sheet
And wish I had a cozy place to warm my chilly feet.
But then I think of pioneers who camped outside all night
And only had a fire’s glow to give them warmth and light.
Sometimes when I am hungry and want something good to eat,
My mother gives me carrots when I’d rather have a sweet.
But then I think of pioneers who thanked God and were glad
For anything at all to eat—my carrots aren’t so bad.
Sometimes when I have chores to do and I would rather play,
I think of pioneers and know they worked most all the day.
And so I guess I can’t complain about things that I must do,
For when I think of pioneers, I’m very blessed—aren’t you?
Here is a real story of just one of the thousands of pioneer children who migrated west in the late 1840s and early 1850s. This is a good one to tell children at a Primary pioneer activity, or a pioneer-themed family home evening. It would be fun if a dad or granddad could dress up for the part and tell the story as if he were Albert reminiscing when he was one of the pioneer children.
"Children Pioneers," by Fay McCracken, Friend, July 1995
Monday, July 11, 2011
CopyCat Magazine Little House Unit
![]() |
| Little House Dioramas made from grocery paper sacks. |
This was probably the most enjoyable and memorable unit of study my children and I did while homeschooling. History is probably my favorite subject, especially American History. I was overjoyed when I found this Jan/Feb 96 CopyCat Magazine unit on the Little House series because I loved to watch the show in the 1970s as a little girl and read the books that my grandmother would buy me each birthday. I couldn't wait to share these books with my children and read them all over again together. In celebration of Pioneer Day this month (July 24th), I'm sharing this CopyCat unit here and at my regular blog for CopyCat fans (http://homemakersjournal.wordpress.com/2011/07/11/copycat-little-house-adventure/)!
![]() |
| Sod house replica made a few yrs. later. |
Saturday, July 9, 2011
Pioneer Day Toy
I kick off my month-long celebration of Pioneer Day (July 24th) by sharing a boredom-buster fun activity for children. It's a thaumotrope--thauma, a Greek word meaning wonder or miracle. Thaumotrope toys predated television and radio and though it was generally a simple toy, it could provide much entertainment. This toy reminds me of an art lesson that is commonly used with children where a drawing is given "life" through the appearance of motion. This would be a good beginner art lesson (not to mention science) as well as a fascinating Pioneer Day toy for boys and girls to play with. This comes from a favorite homeschool or teacher resource: Pioneer Days, by David C. King (ISBN 0439259398)
Saturday, June 4, 2011
Learn Something New this Summer: Cross-Stitch in 5 Minutes
When pioneer women and girls crossed the plains to settle in the western United States, they brought with them their knowledge of homemaking skills and crafts. Many of them were converts from Britain, Scandinavia, and Europe. Traditional needlework was one of the skills they carried with them.
Learning to use a needle and thread to stitch unique designs on small pieces of cloth was often part of a young girl’s upbringing. In this way, mothers, grandmothers, and schoolteachers taught girls the art of needlework. While the girls were learning different stitches, they also learned numbers and letters by stitching and reciting them. These pieces of creative stitching were called samplers.
Stitchers often sewed a favorite saying, quotation, verse, or scripture onto their samplers. Some samplers were decorated with images of birds, animals, trees, fruits, flowers, temples, schools, or houses. The beehive as well as the likenesses of Church Presidents and other leaders were favorite pioneer designs.
After deciding on a design, the stitcher drew it on cloth with a pencil or pen. Then she began sewing, frequently using cross-stitches, as well as outline, stem, satin, and chain stitches. Quite often the stitcher would include her name, age, and the date the sampler was finished. (Julie Wardell, "Stitch a Sampler," Liahona, June 1998)
Subscribe to:
Posts (Atom)