Showing posts with label cooking. Show all posts

Friday, June 14, 2013

Perfect, Easy Biscuits

There are a few things that I think every homemaker should be able to do well, and one of those is make perfect biscuits.  I found a fabulous recipe for 7up Biscuits using Bisquick from www.plainchicken.com.  I was so excited to find this different and easy recipe using Bisquick since I make my own homemade version of a quick mix which uses wheat.
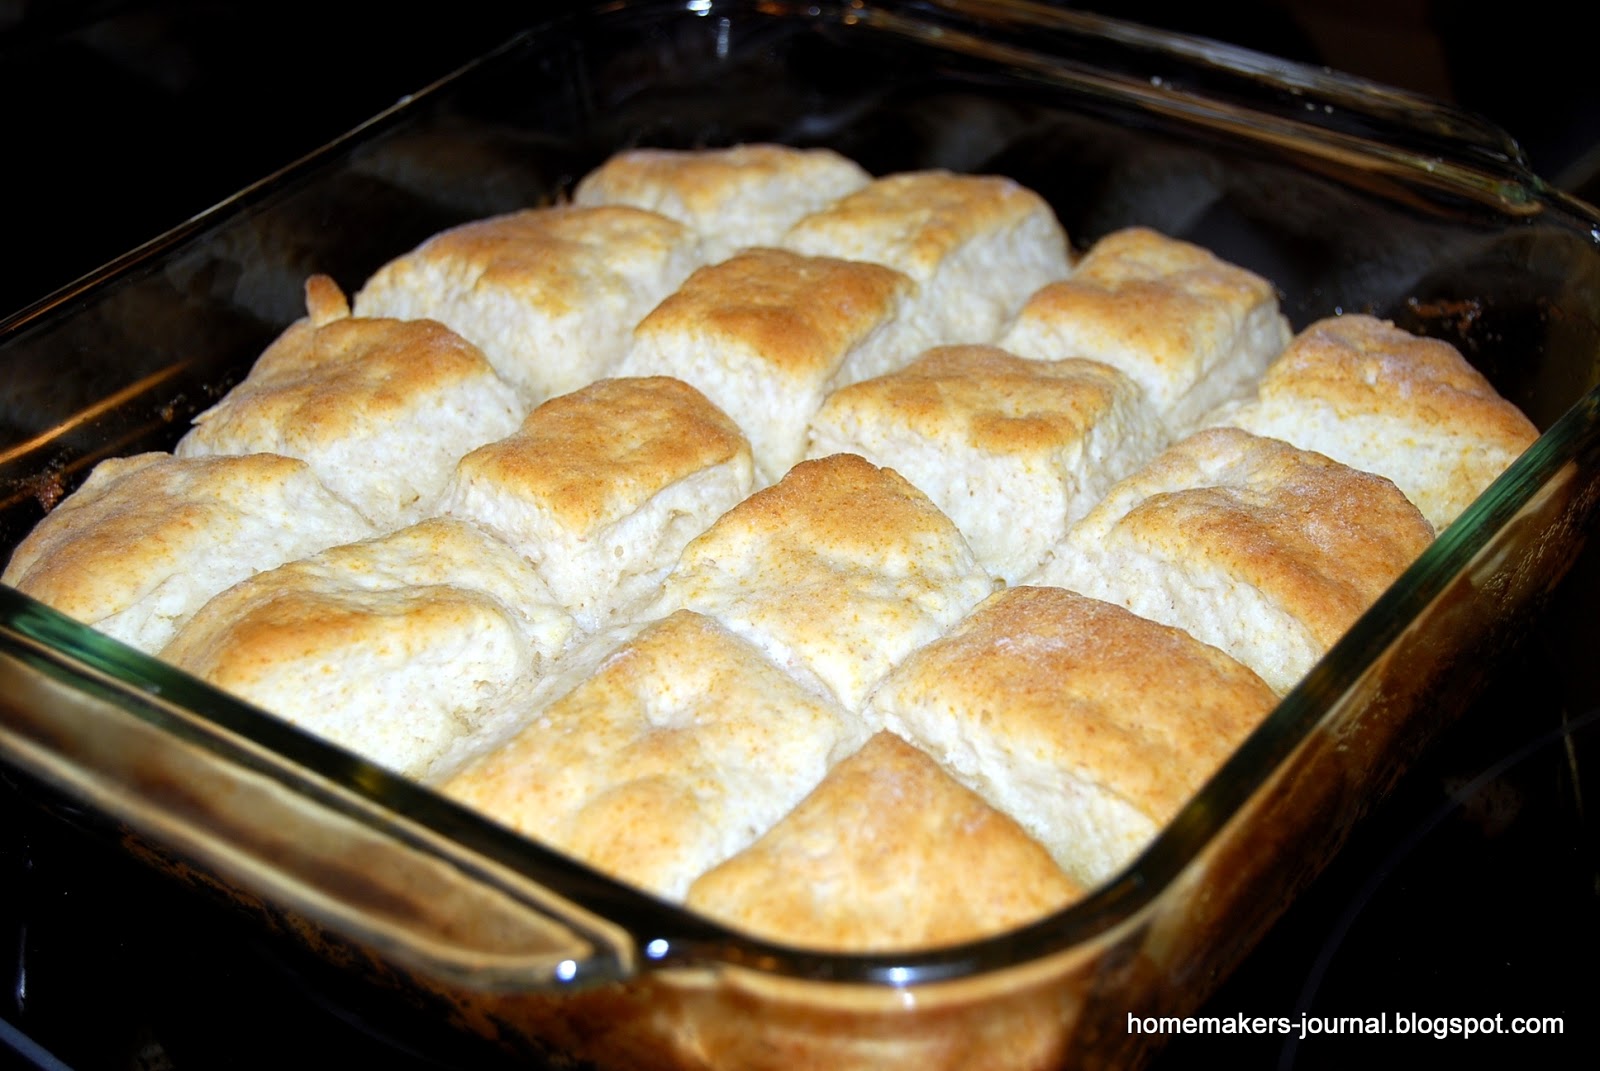

The recipe can be found and printed out at www.plainchicken.com.  I will describe the process adding some helpful hints for those who may be biscuit-making novices.

Step-by-Step Procedure

Heat the oven to 450 degrees F.

I go ahead and melt one-fourth cup of butter in my 9 x 9 inch pan in the oven.  Be sure to take the pan out when butter has melted so it won't brown.

Place two cups of Bisquick, or your own quick mix, into a large mixing bowl.  You can make a well in the center if you like and place a half-cup of sour cream (I like Daisy).

I actually work the sour cream gently into the Bisquick with my fingers until the sour cream has wetted most of the flour mixture thoroughly.

Then I pour 7 Up into a half measuring cup but more-than-likely, I will not use the entire half-cup.

Just sprinkle the 7 Up by Tablespoon over the top of the sour cream and Bisquick mixture.  Use a fork to fluff the 7 Up throughout the mix.

When most of the Bisquick has formed a ball in the center with just a little bit still hanging to the sides of the bowl, the dough is probably ready to gently knead together on a lightly floured counter.  The key is to use as little flour when kneading and only knead enough to be able to pat dough into a square.

Since I don't want to overwork my dough, I don't bother with the biscuit cutter.  I just pat the dough into a square slightly smaller than the measurements of my 9 x 9 inch pan (or 8 x 8), rather than use a rolling pin.

Use a sharp knife to cut into squares.  Then I place each square right onto the butter in the pan basically in the same exact way that I patted and cut it out on the counter.

Bake for 12-15 minutes, or until golden on top.  Cool in pan on a cooling rack (if they last that long!)  They are best served hot from the oven.

Baking Mix Recipes to Try

I like having the biscuits slightly connected so they are flaky and  moist.  This recipe is so good, the texture is almost like making yeast rolls.  This would be a great recipe for camp and cooked in a box oven!  My box oven instructions can be found at Homemaker's Journal, Easy Outdoor Cooking Recipes post.

For more delicious Quick Mix recipes see Homemaker's Journals beautiful and delicious Christmas Coffee Cake post and scrumptious Quick Mix Pancakes found at Some Favorite Campy Things, part 2.

I hope you enjoy this recipe as much as our family has.  I like to experiment with recipes using soda pop as an ingredient.  How do you use soda in your favorite recipes?

Monday, January 7, 2013

How to Freeze Grated Cheese


Lately, I've been trying really hard to stick to a strict grocery budget--after all, when you purchase and eat food, what do you have to show for it?  I'd rather not waste money on food that might get thrown out.

However, it can be tough to purchase items for a two-week period and realize someone just made a snack with the cheese you needed for Thursday night's dinner, (especially when they could have eaten what you prepared for snacks!)  So I try to pre-prepare for my family's meals as much as possible.  

I have started using a permanent marker to label everything that goes into the pantry and fridge for a specific purpose.  That doesn't mean everything is labeled--just what absolutely cannot be used up before I need it.

I remembered that I can go ahead and shred my cheese and spread it out on plastic wrap on a cookie sheet and place in the freezer.  It only takes a few minutes to harden enough to place in a freezer bag and store in the freezer.  Shredding is a good job for one of the kids to do, but you might want to freeze it yourself to ensure it gets properly stored.


Zesty Tomato Soup is a fabulous last minute meal.  Just keep some frozen Monterrey Jack Cheese on hand and cans of tomato soup and some oyster crackers in the pantry.  It's seasoned with chili powder.  It really takes tomato soup up a notch!  I would serve this to last minute company or when having the girls over for lunch. 

Monday, December 10, 2012

When There's Nothing Else to Eat

So I was making a grocery list to determine what I had in the fridge and what I needed from the store.  I noticed that there was about a cup's worth of leftover turkey (or chicken, or ham), a long stalk of celery, a couple of sliced green onions, a couple of handfuls of shredded sharp cheddar cheese, and mayonnaise in the refrigerator.  Then I checked the pantry and found half-a-box of small elbow macaroni.  I never do this--I'm not creative with food, I normally must have a recipe--but for some reason these ingredients just came together in my mind as a really good salad.

I put off going to the store and cooked the macaroni, chopped the meat and diced the celery.  After rinsing the macaroni in a colander under cold water and quick-drying it on paper towels on the counter, I combined all the ingredients together with enough mayonnaise to moisten.  I didn't season it with salt and pepper, leaving that for family members to do.  Then I tried it.  Maybe I was hungry but it was the best macaroni salad I've ever had!

I'm writing this post just to remind myself how I made it.  Even though it's simple, I'm liable to forget.  This was enough for 4-6 large helpings.  (My daughter, a 115 lb. college cheerleader with a coach who will tell you you're fat, actually went back for a second large helping.  This is not normal for her!)  It just goes to show you how often we throw food out or think we have nothing to eat when the leftover and last bits of something can turn into a fabulous (if simple) dinner.  All the ingredients are "to taste."  Some might like more of one thing and less of another.  Print Recipe

Turkey Macaroni Salad
1 cup small elbow macaroni, prepared (or whatever pasta you have on hand)
1-2 cups turkey, (or chicken, or ham), cooked and chopped
1 stalk of celery, diced 
1-2 sliced green onions
1/2 cup grated sharp cheddar cheese 
1/2 cup mayonnaise (enough to moisten the ingredients)
Prepare macaroni according to directions.  Rinse in cool water and drain thoroughly.  Combine all the ingredients adding more mayo if necessary.

Monday, June 4, 2012

The Lady's Chicken Nuggets

Originally a Paula Dean recipe, this has become a family favorite!  These nuggets make a great appetizer, family meal or a filling snack.  This would also work well in a sack lunch.  They are best served warm.  If you make Paula's dip, do it first so it can be chilling and thickening up while you fix the nuggets.

Paula D's Chicken Nuggets (print recipe)
6 chicken breast fillets
2 c. crushed sour cream & onion chips (I use more than I probably should)
1-2 eggs
2-4 T. milk
1/2 c. butter, melted
Preheat oven to 350 degrees F.  Spread the crushed potato chips in a shallow dish.  Beat together the egg and milk in a shallow bowl.  Dip the chicken, (cut into 1-1/2 in. cubes), into the egg mixture and then dredge them in the chips.  Place the chicken nuggets on a greased baking sheet and DRIZZLE WITH MELTED BUTTER, (sometimes I forget).  Bake for 15 to 18 minutes, or until golden brown.  The chicken nuggets can be frozen after baking.  Serve with your favorite sauce, such as ranch dressing or honey mustard. 
Honey Mustard Dipping Sauce (print recipe)
3/4 c. mayonnaise
3 T. honey
2 T. yellow mustard
1 T. lemon juice
creamy style horseradish to taste
1 T. orange juice, more or less
Combine mayonnaise, honey, mustard, lemon juice, and horseradish; stir well.  This with enough orange juice to make a pouring consistency for dressing, or dipping consistency for dip.

Wednesday, January 18, 2012

Peanut Butterscotch Morsels


Had a creative week during Christmas break.  Maybe it was because I was so used to working on Christmas crafts that I started to go through withdrawals and needed a "fix."  So besides coming up with (and maybe someone had already discovered it) Chicken Macaroni Salad, I decided to see what sweets I could quickly create.

I had half a bag of butterscotch chips and half a can of salted peanuts on hand.  That was pretty much it unless I wanted to do some baking--WHICH I DID NOT!  I threw the butterscotchies in a microwave-safe bowl and zapped it for 45 seconds twice, stirring in between.  The bowl was hot so I carefully took it from the microwave and added my peanuts.  Then with a teaspoon I dipped out very small amounts onto wax paper, using a spatula to make sure not one speck of melted butterscotch was left in the bowl.  The spoonfuls set pretty quickly since they were small.  In about 15 minutes the Peanut Butterscotch Morsels were ready.  SERIOUSLY GOOD!

Now that I have this easy, quick fix for a sweet tooth, I'm going to have to increase my workout time for sure.  I'm writing the recipe for my kiddos who inherited their parent's sweet tooth.


Peanut Butterscotch Morsels
1 cup Hershey butterscotch chips (brand melts the best)
1 cup salted peanuts (I wonder how cashews would taste?)
In a microwavable-safe bowl, melt butterscotch morsels for 45 seconds.  (Start with 20 seconds at a time to see how long your microwave takes--it may need more or less time).  Stir just a bit to loosen; microwave for another 45 seconds (depending on your microwave).  Stir morsels just until nearly melted; stir in peanuts to coat.  Dip out mixture with a teaspoon onto wax paper placed on a flat surface.  Let it set for at least 15 minutes--unless you like to eat them gooey :) like I sometimes do.  Once set, they store very well in a ziploc baggie.  Recipe can be doubled.  This would make a nice candy to place on cookie and candy plates you give out at Christmas time.  They are very pretty and would look nice in a pretty dish at a party.

Wednesday, November 16, 2011

The Best and Prettiest Slaw for A Lighter Thanksgiving Menu

A healthy alternative at the Thanksgiving table is our family's favorite slaw.  I wanted to show the clipping because the presentation is so pretty.  I learned this in a Weight-Watcher's class, but the recipe is Southern Living Magazine.  I call it Sweet and Crunchy Slaw because it has cider vinegar in it, unlike the other vinegar slaws I've tried.  

Wednesday, November 9, 2011

Three Day Chili


Instead of cooking the week of Thanksgiving, I fix a big pot of chili that will last for days.  Then it's easier to get ready for our Thanksgiving Feast.  

The first day I made a big thing of rice in my rice maker to go with the chili (one way to rotate rice in my food storage).  I place chili on top of rice and sprinkle grated cheddar on top so it melts.  It's very filling and you can use brown rice for a healthier dish.  

The second day I had chili with corn muffins.  The corn muffins fill you up so you don't eat too much chili.  

The third day I made taco salad using the last of the chili (chopped lettuce, tomato, corn chips or tortilla chips, sour cream, grated cheese, etc.).  See my Tacos in a Frito's Bag.

It was also time to get Scrap Happy!  I had to make room in the refrigerator for my make-ahead Thanksgiving dishes.  I used extra eggs, scraps of cheese, 3 pieces of leftover bacon, toasted some bread, and whipped up the last of the instant grits from the pantry to make scrambled eggs with cheese and bacon tossed in, and toast and grits.  That took about 15 - 20 minutes.  We also have been eating on paper plates all week to cut down on the dish washing.

Pretty Chili 
(Yield: 5 servings--can be doubled or tripled)
1 lb. ground beef
1 c. onion, chopped
1 c. green pepper, chopped
1 can (16-oz.) chili beans, undrained
1 can (16-oz.) dark red kidney beans, undrained
1 can (6-oz.) tomato paste
1/2 c. water
1 T. chili powder
2 t. oregano
2 cloves garlic, minced
Garnish with chopped green onions and sour cream, if desired
In a large pan cook beef, onion and green pepper until meat is browned.  Drain excess grease.  Stir in remaining ingredients except green onions and sour cream.  Bring to a boil.  Cover; reduce heat and simmer for 20 minutes.  Add salt and pepper to taste.  Garnish with green onion and a dollop of sour cream.

UPDATE:  I decided to include my favorite 1980's Taco Salad recipe.  This is the best taco salad and the secret is the refried beans and taco sauce:
1 lb. ground beef
1 pkg. taco seasoning mix
1 (16 oz.) can refried beans
1 (16 oz.) jar taco sauce, DIVIDED
8 c. lettuce, torn in bite-size pieces
1/2 c. sliced black olives
1/2 c. onion, chopped
1 lg. tomato, diced
1 ripe avocado, diced
1 c. shredded cheddar cheese
1 c. tortilla or Frito's chips
Prepare ground beef according to directions on seasoning mix package.  Add refried beans and 3/4 c. taco sauce.  In large serving bowl, arrange half the lettuce.  Add beef and bean mixture.  Top with remaining lettuce, olives, onion, tomato, avocado, cheese and chips.  Serve with remaining taco sauce.  Yield:  6 very hungry servings.

Wednesday, August 31, 2011

Writing My Cookbook


Since childhood, I have always enjoyed creating in the kitchen and trying family recipes.  I wanted to preserve this heritage of cooking, and also provide an opportunity for the other sisters in my church to do the same.  I invited everyone to contribute at least five recipes.  The result is The Fruit of the Spirit, 27th Anniversary of Locust Fork Branch Cookbook.  I also recorded a brief history of the branch as the introduction.  
At one time women "cooked out of necessity, but with pride and confidence,"  (Lynn Anderson, Country Woman, J/F '00).  I think that's what's missing in a lot of homes today.  I enjoy seeing women and men and children take pride in their cooking and develop confidence in this skill.  For years I heard folks belittle real cookery, and yet some of the most famous (and wealthy) people in the world are chefs!  Our family loves watching Master Chef.  Cooking really can seem like magic.  To a small child, mixing a soupy concoction and pouring it on a hot griddle which turns it into chocolate chip pancakes is no less than a small miracle!

One of my favorite things is to collect cookbooks from the past.  I especially like old books on preserving food.  Some of the information in these old books are all but lost.  Just today I found another book on this subject and thought, if the economy crashes at least I'll be able to learn how to cook from scratch--without a grocery store and modern conveniences if necessary.

Whenever possible, I like to get copies of recipes written by my friends and relatives in their own handwriting.  It's especially poignant when the recipes are from loved ones who have passed on.  I like to make notations next to every recipe I've ever tried in each of my cookbooks (usually smiley or frowny faces or I might suggest less or more of an ingredient or omit it completely).  These help me know what I have tried and whether the recipe was worth trying again.  Who knows, maybe some great grandchild one day will try the very same recipe and follow my advice.  Below is a recipe from my late Aunt Phala.


Sometimes I challenge myself to try every recipe that sounds interesting in each of my recipe books.  I could while away the hours just sitting quietly, reading my cookbooks.  I also have an "Idea Book" that is full of recipes clipped out of old Southern Livings, Taste of Homes, etc.  I look at this book for my weekly menus before going to the grocery store.  Then I try the recipes.  If I don't like the dish, I throw the recipe away.  If I love the dish, it goes into a 3 x 5 recipe file.  If I use the recipe enough, then I type it into my latest recipe book I'm creating on the computer using Typensave (more on that in a minute).

Sometimes I'm looking for a new peanut butter cookie recipe to try, or meatballs, or picnic sandwiches.  These are filed in my extremely obese "Idea Book" under Cookies, Appetizers, and Special Meals (or Lunches).  Of course I have a Large Crowds section complete with wedding cake recipes and ideas.

Typensave is a computer program that I got from Morris Press Cookbooks (www.morriscookbooks.com). At their website they give you step-by-step instructions.  I made sure my church cookbooks would sell for $5 each.  I was not trying to make any money off this project so I did the typing myself and used every coupon and cost-saving tip they offered.  I looked at a lot of different companies, but Morris had the best-looking cookbooks and the easiest set-up.  You can even arrange for contributors to go on-line and type in their own recipes!  It couldn't be any simpler.

Another great idea for publishing a cookbook for your own family is to blog your family favorite recipes and then use a site like the following to print the blog:
http://blog2print.sharedbook.com/blogworld/printmyblog/cutestblog/index.html.

Monday, July 18, 2011

Children's Pioneer Recipes


A simple Pioneer Day celebration involving children and families, could revolve around pioneer stories and pioneer recipes prepared for tasting. While people are sharing pioneer stories, the children could pass around a jar of cream and shake it. Butter could be made ahead to insure that there would be enough ready to spread on whole wheat bread (or saltine crackers).

Some people disliked the job of churning so much that they invented a dog-driven churn! An ideal way to show children how long and hard adults and children had to work to make butter in the olden days would be to demonstrate an actual butter churn. A good description of churning butter is found in Chapter Two of Little House in the Big Woods, by Laura Ingalls Wilder. 


Baby food jars could be used for each child to churn their own butter. Fill each jar 2/3 full of refrigerated heavy cream (not light or half-and-half...it must be heavy!). Fasten jars securely. Shake up and down vigorously. While shaking, or churning, sit in a circle and talk about where the cream came from, and how in the olden days cream would rise to the top of a bottle of milk.

To pass the time while churning, children often used to recite this traditional chant: "Come, butter, come! Come, butter, come! (Peter) standing at the gate. Waiting for a butter cake...Come, butter, come!" Go around the circle, give each child a turn to substitute his or her name in the chant.

After about 10 minutes of shaking, the children will notice a change--no more sounds of sloshing cream inside the jar! At this point, what they have made is whipped cream! Encourage them to keep shaking...in just another minute or two, a round ball, surrounded by liquid, will begin to form inside the jar. This round ball is the butter, and the liquid is buttermilk.

Children should then drain off the water into a cup--some adventurous children may enjoy drinking the rich buttermilk. If you find you have more cream than you need for each child's butter jar, use the extra to fill a larger jar 2/3 full, and proceed as above, but stop the process when you reach the whipped cream stage. Serve with fresh berries and a bit of sugar.

"The Olden Days" ("Science World," November 5, 1993)

Homemade Butter
1/2 cup whipping cream
1 tablespoon sour cream
pinch of salt, optional
Put both creams into a jar with a tight-fitting lid; shake vigorously.  After a lump of butter forms (about 15 minutes), pour off the remaining liquid (whey).  Place the butter on a plate and press it gently with a spoon to remove the remaining liquid.  If desired, sprinkle with salt.

Navoo Ginger Cookies
1/2 cup sugar
1/2 cup molasses
1/3 cup oil
1/3 cup water
1 egg
3-1/2 cups flour
1/2 teaspoon baking soda
1/2 teaspoon cinnamon
1/2 teaspoon ginger
1/4 teaspoon salt
In a large bowl, mix together the sugar, molasses, oil, and water.  Beat in the egg.  In a separate bowl, combine the dry ingredients.  Add the dry mixture in three parts to the wet mixture, stirring well after each addition.  Shape the dough into 1 inch balls and place them on a greased cookie sheet.  Bake at 350 degrees for 8-12 minutes.

Johnnycake
(A favorite dish of the Prophet Joseph Smith)
1 cup cornmeal
1/2 teaspoon baking soda
1 teaspoon cream of tartar
1/4 teaspoon salt
1 egg, beaten
1 cup milk
1/4 cup honey
1 tablespoon molasses
1 tablespoon butter or margarine, melted
Combine the dry ingredients in a large bowl.  In a separate bowl, mix together the remaining ingredients.  Blend this mixture into the dry ingredients, mixing just enough to combine.  Put the batter into a greased 8 inch square pan.  Bake at 425 degrees for 25-30 minutes.  Serve hot with Homemade Butter.

Old-fashioned Pickles
1 medium onion, thinly sliced
1 large cucumber
1 cup vinegar
2/3 cup water
1/2 cup sugar
1/2 teaspoon salt
pinch of pepper
Put the onion slices into a one-quart glass jar that has a lid.  With a fork, scrape down the length of the cucumber; repeat, going all around it.  Slice the cucumber and add it to the jar.  Combine the remaining ingredients in a bowl, then pour into the jar.  Cover the jar and refrigerate for at least 24 hours before serving.  
"Kitchen Krafts," Friend, July 1993

Thursday, June 30, 2011

Teaching Children to Cook

A girl should learn to make a bed, 
To bake good biscuit, cake, and bread;
To handle deftly brush and broom,
And neatly tidy up a room. ~1899

These instructions are from our collection of American Girl cookbooks.  They pretty much covered everything so well, I decided to include it on my blog:
  1. Always work with an adult.
  2. Wash hands with soap and water.  Wear an apron, tie back your hair, and roll up your sleeves.
  3. Read a recipe carefully, all the way through, before you start it.  Look at the pictures.  They will help you understand the steps.
  4. Gather all the ingredients and equipment you will need before you start to cook.  Put everything where you can reach it easily.
  5. A good cook measures exactly.  Here is a hint for measuring flour.  Spoon the flour into a measuring cup, heaping it up over the top.  Then use the spoon handle to level off the flour.  Don't shake or tap the cup.
  6. Learn from an adult how to peel, cut or grate with sharp kitchen tools.  Always use a chopping board to save kitchen counters.
  7. Pay attention while using knives so that you don't cut your fingers!  Remember, a good, sharp knife is safer than a dull one.
  8. When you stir or mix, hold the bowl or pan steady on a flat surface, not in your arms. 
  9. Make sure your mixing bowls, pots, and pans are the right size.  If they are too small, you'll probably spill.  If pots and pans are too large, foods will burn more easily.
  10. Clean up spills right away.
  11. Pots and pans will be less likely to spill on the stove if you turn the handles toward the side.
  12. Have an adult handle hot pans.  Don't use the stove burners or the oven without permission or supervision.
  13. Turn off the burner or the oven as soon as a dish is cooked.
  14. Potholders and oven mitts will protect you from burns.  Use them when you touch anything hot.  Protect kitchen counters by putting trivets or cooling racks under hot pots and pans.
  15. Keep hot foods hot and cold foods cold.  If you plan to make things early and serve them later, store them properly.  Foods that could spoil belong in the refrigerator.  Wrap foods well.
  16. If you decide to make a whole meal, be sure to plan so that all the food will be ready when you are ready to serve it.
  17. When a recipe gives two cooking times--for example, when it says, "bake 25 to 30 minutes"--first set the timer for the shorter time.  If the food is not done when the timer rings, give it another five minutes (or more as necessary).
  18. Cleanup is part of cooking, too.  Leave the kitchen at least as clean as you found it.  Wash all the dishes, pots, and pans. Sweep the floor.  Throw away the garbage.
We may live without poetry, music and art:
We may live without conscience and live without heart;
We may live without friends, we may live without books,
But civilized man cannot live without cooks.
~Owen Meredith

Wednesday, June 29, 2011

St. Patty's Day Family Night

Just found this old homeschool photo "Green Eggs and Ham."
We did this for Family Home Evening last Monday night and my husband and 15 yr. old son clearly enjoyed the activity the most.  My husband was in charge of hiding the clues, and since we have a 21, 18, and 15 yr. old he made it hard.  He said it was more fun than hiding Easter eggs.  My son found the most clues.  We usually make the treat every St. Patty's Day, but I thought it went well with the activity.
Pot of Gold Coins
24 Ritz crackers
1 c. smooth peanut butter
2 c. butterscotch chips
Spread half of the crackers with peanut butter.  Top with second cracker.  Melt butterscotch chips and then dip crackers in butterscotch.  Place on wax paper to set, then gobble up.


Have a Treasure Hunt
Step 1 
Write the Clues.  Get seven pieces of paper and copy the following clues.  Be sure to write the clue number by each verse.


Step 2
Make the Treasure.  Find a shoe box to put the treasure in.  Then write a short note to everyone in your family, telling them how much you love them.  You may want to draw a picture of your family (I used a recently taken family portrait).  Put these treasures into the box.  [My Idea:  Maybe add the ingredients to the recipe for "Pot of Gold Coins" into the box to make as a family, after the "treasure" is found].  You can even wrap the box and put a bow on it.


Step 3
Hide the Treasure.  Keep clue 1 out to give to your family.  Then hide the other clues.
Clue 2--hide in a shoe somewhere in the house
Clue 3--hide behind a door
Clue 4--hide near a sink
Clue 5--hide beneath a chair
Clue 6--hide by a picture frame
Clue 7--Hide near a mirror
Treasure box--hide beneath a bed


Step 4
Assemble the Family.  Tell them they are going on a treasure hunt.  Give them clue 1 and HAVE FUN!


Clue 1  Roses are red, Violets are blue.  To find clue 2 Look in a shoe.
Clue 2  Wasn't that fun?  Are you ready for more?  To find clue 3, Look behind a door.
Clue 3  Move right along As quick as a wink And find clue 4 Hidden near a sink.
Clue 4  Getting tired?  Don't despair.  Go find clue 5 Beneath a chair.
Clue 5  You're doing great Playing this game.  Go find clue 6 By a picture frame.
Clue 6  You're almost through With your inspection.  Go find a clue By your reflection.
Clue 7  The game is finished, So go ahead.  You'll find the treasure Beneath a bed.


(Marene Ebert, "Have a Treasure Hunt," Friend, Oct. 1981, 8)

Try these Bierocks for an quick and easy "sorta American-Irish" meal.

Sunday, May 15, 2011

Honey Wheat Muffins (Rotation Recipe)

Muffins pictured with oatmeal cookies.
This is a great way to introduce wheat into your family's diet.  The honey makes these muffins so sweet that any child will want to eat them right up.  They are a quick and easy replacement to whole wheat dinner rolls!

Honey Wheat Muffins
1 c. flour
1/2 c. whole wheat flour
2 t. baking powder
1/2 t. sea salt
1 egg
1/2 c. honey
1/2 c. milk
1/4 c. vegetable oil
In a large bowl, combine flours, baking powder, and salt.  In another bowl, beat egg, honey, milk, and oil; stir into dry ingredients just until moistened.  Fill greased muffin cups 3/4 full.  Bake at 375 degrees for 18-20 minutes or until muffins test done.  Cool in pan for 10 minutes before removing to a wire rack.  Yield:  6-8 muffins

Monday, May 2, 2011

Freezing Herbs


Herbs do comfort the wearied [brain] with fragrant smells which yield a certain [kind] of nourishment. ~William Coles

I finally created my own herb garden last year that had just a few herbs that I usually cook with.  They have come back beautifully this spring.  It is important to keep these trimmed so they stay beautiful and useful in my cooking.  So when necessary, I freeze them.  Here is the easiest method I have found:


Rinse parsley in a colander.  Blanch parsley for only a few seconds in boiling water.


Place each sprig of parsley on towels to air cool.  Remove the stems, chop if you wish, or leave in whole leaves to chop later. 


To make separating herbs easier when they're frozen, lay the dried herbs out in a single layer on wax paper.  


Roll or fold the paper so that there is a layer of paper separating each layer of herbs. 


Then pack, paper and all, in freezer bags.  To use, break off as much as you need, and chop, if you didn't earlier.  Use frozen.  They may also be thawed in refrigerator, where they will keep in good shape for a week.


You can also freeze individual portions as ice cubes.  Herb ice cubes are particularly good if you make a lot of soups and stews--just pop one or two cubes in as your dish is cooking.  To make herb ice cubes, merely prepare your herbs by removing the stems and chopping, and then pack them into ice cube trays, and cover with water, and pop into the freezer.  When frozen, remove the cubes from the trays and store in freezer bags.  If you use boiling water, you're not only covering them to protect them from exposure to air, you're also blanching them at the same time.  (From Stocking Up III, The All-New Edition of America's Classic Preserving Guide, by Carol Hupping and the staff of the Rodale Food Center.)

This can be done with basil, cilantro, chives, tarragon, and mint as well.  Here are some delicious recipes using fresh (or frozen) Mint:

Mint Chicken
2 skinless, boneless chicken breast halves - cut into bite-size pieces
1 clove garlic, crushed
1/2 c. all-purpose flour
1/2 c. butter
1/4 c. fresh lemon juice
1/2 c. chopped fresh mint leaves
In a medium bowl, mix together the chicken pieces and garlic.  toss with the flour just to coat, and shake off excess.  Heat the margarine in a large skillet over medium-high heat.  Add the chicken pieces; cook and stir until browned.  Add the mint leaves and lemon juice, cover and steam for about 5 minutes, just until the chicken is cooked through.  Do not over cook the chicken or it will be tough.


Clover Mint Tea
Gather peppermint leaves and clover flowers in the early morning.  Spread them on separate plates or paper towels and dry at room temperature.  When dry, crumble the mint and clover...store in separate jars...and follow the recipe below.
4 t. dried red clover blossoms
2 t. dried peppermint leaves
4 c. boiling water
wildflower honey
4 cinnamon sticks
Crush the clover and mint leaves; place in a teapot.  Pour water over leaves and steep, covered, 10 minutes.  Strain and serve hot or iced with honey and a cinnamon stick for stirring.  Yield:  4 servings.

Sunday, May 1, 2011

The Legacy of Meal Planning, continued


The kitchen is the heart of the home, and the mother is queen of the kitchen. ~Owen Meredith

Meal planning lends us time to work on the families’ table manners. Each person, no matter how young or old, should show gratitude for the meal that is placed before him. We should never verbally complain about the food offered at home or elsewhere. Remind children of the work involved in making the meal. Parents set the tone for grateful living. New manners lessons can be introduced one meal at a time over the weeks and months. Manners to work on can include passing the dishes counterclockwise, asking the host/hostess if you may be excused, learning to set a table correctly, and learning to introduce people to one another. Also, when children learn to prepare dishes, there are kitchen manners as well such as the rule that messes must be cleaned up before the dish is eaten.


Take a few minutes to make this table-setting place mat I found in Family Fun magazine quite a while back.  Fashioned from shapes of colored paper that show the proper locations for the plate and silverware, this mat effortlessly teaches the fine art of setting the table.  Kids will feel good about being able to help out, and they'll get practice in following a diagram.  Colored drawing paper can be tacked together with glue, then laminated on both sides with Con-Tact paper.

Mealtime should not be a battle of wills. Don’t let anyone snack between meals. If children don’t finish the meal, they do not need a snack or dessert. Children who are picky eaters have had their preferences catered to too often.


Finally, on those rare occasions of eating out with kids, keep them busy at the restaurant. Give them a snack before leaving home and go prepared with milk and cheerios. Save a small bag of “quiet toys” that are only for eating out (include crayons and paper) and dine early to avoid the rush.


It is important to always remember that even though we want to be efficient meal planners, the kitchen can be the most therapeutic room in the home. “We go to great effort to save time in the kitchen, but there’s a sort of time in the kitchen that cannot be sacrificed or replaced. It’s a strategic baking cookies or stirring the pot and listening time” (Table Talk, p. 123. Mimi Wilson & Mary Beth Lagerborg).  


Ruth B. Wright expressed it this way, "The best conversations happen around our kitchen table.  Many times we have laughed, cried, shared feelings, hopes and dreams; sorted out differences; solved the problems of the world; recognized our strengths and weaknesses into the wee hours of the morning."  

There is a special bond among those who break bread together--a custom established by the Savior, Jesus Christ. It is a precious legacy we can leave our families and is worthy of our time and attention.
To be a good cook you have to have a love of the good, a love of hard work, and a love of creating.  Some people like to paint pictures, or do gardening, or build a boat in the basement.  Other people get a tremendous pleasure out of the kitchen, because cooking is just as creative and imaginative an activity as drawing or wood carving, or music.  And cooking draws upon your every talent--science, mathematics, energy, history, experience--and the more experience you have the less likely are your experiments to end in drivel and disaster.  The more you know, the more you can create.  There's no end to imagination in the kitchen.  ~Julia Child

Friday, April 29, 2011

The Legacy of Meal Planning


Over the years, I have realized one eternal truth—motherhood is 24/7.  If you want or need a break, you have to decide to take one.  However, these have to be timed just right or they will not be as beneficial as you need them to be.  If you know that most afternoons are going to be spent from 3pm to 7 - 8pm taking children to a 40 minute orthodontist appointment, and/or 90 minutes of piano lessons, and/or a 2 hours of cheer practice, and/or 2 ½-3 hour cross country meets, not to mention as-long-as-you-can-stand-it fund raisers, and the 15 minute church activity that took you 30 minutes to get to, etc., then you don’t need to add any additional errands to this list.


Errands need to be done while the children are at school and as early as possible.  You need to get your work done quickly and efficiently so that you have time to work on personal projects, (like painting the bathroom…) and still have time to get plenty of rest before you pick up the children.  That requires a healthy lifestyle so that you have the energy it takes to do all this.  Getting a 30 minute walk or workout, taking a vitamin, and eating nutritious meals are vital to having the stamina to be a mom.  But do not forget the necessary down time that we should take each day before we head out at 3pm.  We need to understand our limits and allow ourselves the opportunity to recharge, such as reading a book for fun, taking a hot bath, doing some yoga stretches, reading the scriptures.  It is also good to encourage your husband to do something to recharge each day as well.

Meal planning should be an important part of each day.  When it comes to planning meals, we must ask ourselves, what are the wisest uses of our time and money?  With children at home, three-hour meals just don’t make sense.  “There are so many options, so much to do, so many demands on women.  There is no point in taking one hour to do a ten-minute task, nor should we slap together an hour-worthy project in ten minutes.” (Elaine Cannon)  As a mother, taking time to plan is essential.

Planning can help us actually enjoy the meal we have prepared instead of being too tired to eat.  Planning the week helps us know what days mealtime needs to be simplified due to appointments or having to eat in shifts.  Planning meals allows us to invite company for dinner or go on a picnic.  Meal planning helps us change things up by trying out new recipes (put winners in a file to record in cookbooks).

Planning our meals involves keeping a running grocery list that everyone can contribute to so there is no back and forth to the grocery store because we forgot something.  I like to prepare meals that I call “one-dish meals” because they do not really require sides since the meat and veggies are all together, (like chicken-pot-pie).  I also like to find the “perfect recipe” for recipes such as pancakes, mac-and-cheese, biscuits, etc.

The best way to become a proficient meal planner is to work out a basic schedule of seven to twenty-eight menus that you can become proficient at.  These are the meals we eat most regularly.  Just start a list that includes each meal you make at home until you have come up with twenty-eight.  It is a known fact that most folks generally eat the same things each week and each month.  These recipes can be organized into a notebook, and eventually a master grocery list prepared so that the basic ingredients are collected in your pantry.

Being prepared in this way helps you to have the opportunity to get really good at cooking one thing such as bread, cookies, or even a freezer meal—and then make two to give one away.  When you are prepared, it can be very gratifying to give service in this way.  Also, before going  to bed, I like to figure out what I will need to do for tomorrow’s dinner, such as does something need thawing or marinating, etc.?

Meal preparation helps me buy most of the groceries for the week at one time from the cheapest, nearest store and then forbid myself from going back—even if we have to drink powdered milk to get through the end of the week!  If I run out of something like cereal, then it takes no time at all to make homemade oatmeal.  Meal planning also helps me choose recipes with fewer ingredients, making the dish cheaper and less work.

Be flexible because schedules will change.  Children will begin to eat more, or we may have to switch menus around on the calendar at the last minute because something was accidentally eaten!  Learn to cook from scratch.  Then you will know how to make homemade biscuits when a recipe calls for canned biscuits, or homemade chili or tacos when you don’t have the seasoning packet, or homemade mac-and-cheese from leftovers in the fridge and pantry.  Basically, if you know what’s in a dish, then you can figure out at a glance what you have on hand and what you can make with it.  If you only have eggs and some leftover meat or veggies, you can make amazing omelets or quiche!


Wednesday, April 27, 2011

Kid-FRIENDly Meals


The Friend magazine is a wonderful publication of The Church of Jesus Christ of Latter-day Saints, for young children pre-K through primary grades).  I printed off a stack of recipes from the Friend magazine to try with my family.  This was a huge hit and it literally only took me 30 minutes to make.  These recipes are simple enough to make with children.  They are from the "Kitchen Krafts" section of the June 1981 Friend.

Waldorf Salad
2 c. diced unpeeled apples
1 c. diced celery
1/2 c. chopped nuts
1/2 c. mayonnaise
1 t. lemon juice
1 t. sugar
Combine apples, celery, and nuts in mixing bowl.  Blend together mayonnaise, lemon juice, and sugar.  Stir into salad until thoroughly mixed.  Chill, then serve on crisp salad greens.  Yield:  4 servings.

Cheesy Baked Fish
1 lb. frozen fish fillets (perch, haddock, turbot--we used tilapia), thawed
2/3 c. condensed cream of celery soup
3/4 c. dairy sour cream
1 c. shredded cheddar cheese
Separate thawed fish fillets and drain on paper towels.  Arrange in buttered 9-inch square baking dish.  Combine undiluted soup and sour cream in 1-quart saucepan.  Add 3/4 c. cheese, then, over low heat, stir constantly until cheese melts.  Spread mixture over fillets and bake at 375 degrees for 20-25 min. or until fish flakes.  Sprinkle remaining 1/4 c. cheese on top, return to oven, and bake for 5 min. more.

Sunday, April 24, 2011

Bread for Beginners


I really started getting somewhere with my bread skills after I discovered bread recipes that used an egg in them.  Sometimes they are allowed to rise overnight in the fridge.  This type of dough is so much easier to handle to novice bread makers than dough without the egg.  I am no scientist or expert bread maker so I cannot exactly tell you why this is.  If you know, please comment on this.  But once I began using these types of recipes, I was able to concentrate on using as little flour as possible,thereby making some light and fluffy rolls.  Over the years, I have tested many recipes and settled on this one because it is fast, easy and incorporates wheat.  I have included this recipe on my Preparedness: Wheat Page because recipes with wheat will help rotate wheat in the food storage pantry.  Here is the recipe.  Instructions with photos follow.

Make-Ahead Whole Wheat Crescent Rolls
1 c. warm milk
1/4 c. sugar
1 t. salt
1/4 c. shortening
1 pkg. active dry yeast (1 T.)
1/4 c. warm water (105 - 115 degrees or lukewarm)
1 egg
 2 c. whole wheat flour
1-1/2 c. all-purpose flour
melted butter (optional)
Scald milk; stir in sugar, salt, and shortening.  Cool mixture to lukewarm.  Sprinkle yeast in warm water; stir until yeast is dissolved.  Add milk mixture, egg, and whole wheat flour, beating until smooth.  Add all-purpose flour to make a soft dough.  Place in a greased bowl, turning to grease top.  Cover and let rise in a warm place 1-1/2 to 2 hours or until doubled in bulk.  Punch dough down; turn out on a lightly floured board.  Roll half of dough into a circle about 10 inches in diameter and 1/4 inch thick.  Cut into 12 wedges, and brush with melted butter.  Roll each wedge tightly, beginning at the wide end.  Seal points.  Place on greased baking sheets with point underneath; curve into crescent shape.  Repeat with remaining half of dough.  Cover and let rise until double in size.  Bake at 375 degrees for 12-15 minutes.  Yield:  24 rolls.


Scald Milk, stir in next three ingredients.


Sprinkle yeast in warm water and stir until dissolved.

Milk mixture should be cooled to lukewarm before combining with yeast mixture.  Add wheat flour by spooning one tablespoon at a time into measuring cup.


Scrape off the excess flour with the blunt end of a table knife.

Tip:  Grind a few cans of food storage wheat at a time and double bag in freezer bags.  Keep ground wheat in freezer until needed.  I keep a container in my fridge for daily use.  The freezer bags take up little space in my freezer and keeps the wheat fresh.


Mix egg, milk mixture and wheat until it looks like cake batter.

I change to a dough hook when it is time to add the all-purpose flour.  Be sure to measure all-purpose flour the same as the wheat flour (spooning into measuring cup).  When all-purpose flour has been mixed in, the dough will be easy to scoop up with hands and place in a large GREASED mixing bowl.

I spray the bowl lightly and then the top of my dough.


Preheat oven for a few minutes on the lowest temperature for your oven (mine goes down to 170 degrees).  You just want a warm oven, not hot.  Cover the bowl loosely with plastic wrap and place on the top rack (which is lowered).  I place a small bowl of warm water on the lowest shelf to keep the oven humid.  Close the oven door.  Be sure to set your timer.

After rising, take bowl out of oven, 


Gently punch dough down with fists,

Take the lump of dough and divide it into two balls.

Place one of the lumps on a lightly floured surface.

Flatten this out some with hands.

Roll out with a lightly floured rolling pin, according to recipe.

Using a pizza cutter, cut dough into 6 slices. 


Cut each of the six slices to make twelve slices total.

Brush the slices with melted butter, if you prefer; roll each slice.

Place the crescent rolls on a parchment-lined cookie sheet, points down.

Spray one side of plastic wrap and place over rolls.

Place back in the oven with the bowl of water (no need to reheat oven if the door was left shut).

Let them rise until doubled in size (about 45 minutes).  Remove plastic wrap and turn oven onto 375 degrees.

Bake according to recipe.  Cool slightly and remove from pans and place on cooling racks.  Enjoy!

LinkWithin

Related Posts Plugin for WordPress, Blogger...