Showing posts with label provident living. Show all posts

Saturday, March 26, 2016

Real Food Storage Resources (not MREs)

The history of the world is the record of man in quest of his daily bread and butter. ~Hendrik Van Loon
Food storage can be a real relief even if it's as simple as a few home-cooked casseroles stocked in the freezer for those "bad days," or a cabinet full of cans of chicken noodle soup when you have a cold.  Becoming prepared can seem like an overwhelming task, but it can be as simple as buying two cans of diced tomatoes and putting one in storage and the other in the kitchen.  Continue this with the rest of the grocery list.

Strive to have 72 hours worth of ready to eat food.  Then make it a week's worth and eventually 4 week's worth.  Next multiply that by 12 and I'll bet you will have a year's supply of food.  Do the same with paper products, hygiene, first aid, etc.

Of course storing a year's supply depends on whether you have the room.  Maybe you only have space for 72 hours or a week--it's okay to do what you can.  There is peace in knowing you can "shop" your pantry and not have to run to the store for every little thing!

Here are some sites I return to again and again for food storage knowledge and inspiration:
The Family Homestead is a site I enjoy exploring for inspiration.
http://thefamilyhomestead.com/
LDS Church Provident Living site runs the whole gammut of preparedness training.  I personally have used this site to buy a year's worth of food storage.
Provident Living is a source for food storage purchases.  They teach about preparedness and gardening and much, much more.
Food Storage Made Easy is your food storage 101 class for newbies.
Preparedness Skills
Random Sampler of Great Ideas!  (Ensign, June 1974) Has a ton of useful information beginning with how to dehydrate all kinds of food from the garden and even meat!  It explains how to smoke and can fresh caught fish.  I get a thick sales paper each week in my mailbox that must be put to some use or thrown away.  An idea is given to turn newsprint into bundles that can be stacked and used like wood.  (Or make these cute pioneer haysticks with newspaper that I found at Martha Stewart).  Whether a camping enthusiast or survivalist wannabe, learning how to cook using a tin can is a useful skill.  Instructions are given for recipes, a buddy burner, stove and oven.
Food Storage Rotation
For the real enthusiast, the question is how to keep up with the food storage and rotate it out so that nothing spoils and is wasted.  "Tracking Our Food Storage," by Leslie O. Anderson (Ensign, Feb 1996) uses a system much like the old library cards where each section of food storage has a card or slips of paper that you pull when you take something from that shelf.  Then you put the slips with the grocery list and replace the items.

Wednesday, May 7, 2014

Favorite Store-Bought Baking Mixes

and What You Can Make with Them...

These hand pies were made with Pioneer Baking Mix.  I baked these in the oven with apple pie filling, but they also make great meat pies.  So quick and easy!  Fill with Sloppy Joe mix and maybe some shredded cheese.


Jiffy Corn Muffin Mix--the first dish I learned to make (in a seasoned iron skillet of course!)  I also like using the Jiffy Pizza Crust to make the yummiest bread sticks.  You can find a picture of my breadsticks and the recipe here.  (Just found this great vegetable side with Jiffy: Corn Pudding.


Krusteaz Pie Crust--Just soooo easy!

Pioneer Baking Mix--light and fluffy, beautiful :-)


Wednesday, February 19, 2014

Vintage Desserts: Brownie Pudding

An avid collector of vintage cookbooks, my overall favorites are Better Homes and Gardens Cookbooks.  We have three from various decades in our house (not to mention other BHG specialty cookbooks).  There is always a Brownie Pudding recipe because this is a best loved dessert.  It comes from a January 1944 Better Homes and Gardens magazine.

1944 Better Homes and Gardens Brownie Pudding
My oldest daughter makes Brownie Pudding every chance she gets.  The house smells wonderful and what a welcome sight on a cold winter's day!  Children would probably find the results of this recipe "magical."  This is a recipe I'm sure your family will love!


Do you love Better Homes and Gardens Cookbooks too?  What is your best-loved recipe?  I would love to hear from you!


Brownie Pudding  (recipe HERE)
(Better Homes and Gardens Cookbook)
1 c. all-purpose flour
3/4 c. granulated sugar
2 T. unsweetened cocoa powder
2 t. baking powder
1/4 t. salt
1/2 c. milk
2 T. cooking oil
1 t. vanilla
1/2 c. chopped walnuts (or pecans), optional
3/4 c. packed brown sugar
1/4 c. unsweetened cocoa powder 
1-1/2 c. boiling water
Vanilla ice cream (optional)
Grease an 8x8x2-in. baking pan; set aside.  In a medium bowl stir together the flour, granulated sugar, the 2 tablespoons cocoa powder, the baking powder, and salt.  Stir in the milk, oil, and vanilla.  Stir in the nuts.
Pour batter into prepared baking pan.  In a small bowl stir together the brown sugar and the 1/4 c. cocoa powder; stir in the boiling water.  Slowly pour water mixture over batter.
Bake in a 350 degree oven for 40 minutes.  Cool on a wire rack for 45 to 60 minutes.  Serve warm.  Spoon cake into dessert bowls; spoon sauce over cake.  If desired, serve with vanilla ice cream.
Abbreviations: 
T. = tablespoon
t. = teaspoon
c. = cup


Thursday, November 7, 2013

Vintage 1941 Chocolate Chip Cookies

My favorite cookbook is Better Homes and Gardens.  I have two copies, both of which are falling completely apart.  One I received as a wedding gift twenty five years ago.  My daughter has a third copy.  I recently found a Better Homes and Gardens chocolate chip cookie recipe that interested me because it used equal parts shortening and butter.  


Any time a cookie recipe uses shortening, I know it will turn out beautifully—crisp on the outside, gooey goodness on the inside.  This recipe turned out perfectly the first time, and more importantly, the raw cookie dough was delicious!   

What do you think?  Do you prefer using shortening in your baked goods.  Does it make a difference?


Vintage 1941 Better Homes and Gardens Chocolate Chip Cookies 
Get the recipe HERE.
1⁄2 c. shortening 
1⁄2 c. butter 
1 c. packed brown sugar 
1⁄2 c. granulated sugar 
1⁄2 t. baking soda
2 eggs 
1 t. vanilla 
2-1⁄2 c. all-purpose flour 
1, 12-oz. package (2 c.) semisweet chocolate pieces 
1-1⁄2 c. chopped walnuts, pecans, or hazelnuts (filberts) (optional) 
1. In a large mixing bowl beat the shortening and butter with an electric mixer on medium to high speed for 30 seconds. 2. Add the brown sugar, granulated sugar, and baking soda. 3. Beat mixture until combined, scraping side of bowl occasionally. 4. Beat in the eggs and vanilla until combined. 5. Beat in as much of the flour as you can with the mixer. 6. Stir in remaining flour. 7. Stir in chocolate and, if desired, nuts. 8. Drop dough by rounded teaspoons 2 inches apart on an ungreased cookie sheet. 9. Bake in a 375 degree oven 8 to 10 minutes or until edges are lightly browned. 10. Transfer cookies to a wire rack; cool completely. 11. Makes about 60 cookies. 
Note: To measure shortening with ease, place plastic wrap in the measuring cup and pack cup with shortening using a rubber spatula. Pull plastic wrap out of the cup and drop the shortening into the mixing bowl. Throw plastic wrap away—no mess!

Sunday, October 13, 2013

Pinterest Recipes I've Tried (and my adaptations)

For the past couple of weeks, I have been using recipes I found through Pinterest to make meal preparation a little more interesting.  All of these recipes have been quite a success, though I did make a few modifications now and then.  (One time I forgot to turn on the crockpot.  All that was in the pot was potatoes and spices, so I made the meal on the stove instead to make up for lost time.  That was the Slow Low Country Boil).  I did not take pictures of each of these meals because it had not occurred to me to write about this experience.  But I saw that one person had a Pinterest board for pins she had tried.  I want to do that too!  I would like to share my thoughts on the following pins (and to remind myself of any adaptations I would make).  

Here is my Pinterest Board:


Visit Heather's profile on Pinterest.

Skillet Rosemary Chicken 2-24-14
Words cannot describe how delicious and how easy this recipe was!  I used dried rosemary because that is all I had, and I just put all the herbs, spices, olive oil and lemon juice in a blender and pulsed it real good.  I even forgot to place the chicken in the lemon mixture before browning the skin in the skillet, so I basted the chicken really good after I placed it on my mushrooms and potatoes.  I wanted to use up some Idaho potatoes and they worked fine.  I couldn't find anything at Walmart that said cremini mushrooms so I used the cute little white ones.  Those were the best tasting mushrooms I literally have ever had!  And the potatoes turned out very tasty as well.  I only cooked four thighs and all the ingredients fit perfectly in my skillet.  I keep my iron skillet well-seasoned so everything slid out like it was supposed to and I feel the skillet really added to the flavor.  I HIGHLY recommend this recipe.  I can't tell you how good it is to find a thigh or leg recipe that's out of this world like this one.  I collect these recipes because legs and thighs are more economical to buy than white meat.  You can find a great chicken leg recipe I made right HERE.


Freezer Breakfast Burritos

Here is a picture of the Breakfast Burritos.  They were sooooooooooooooooo good!  They were actually better after reheating them in the microwave than they were fresh.  The cheese just got so gooey good.  I can see this being a must have on any kind of trip, especially a camping trip.  If your family likes to eat breakfast, these breakfast burritos are a must-have in the freezer.  I really love collecting and preparing a month-full of dinners at one time and now I plan on doing the same with breakfast foods. 
I did about a half-recipe to try the recipe out for the first time and I recommend doing that because there is a lot going on at one time.  It might be good to have a helper like a child who likes to grate cheese and stir the hash browns or lightly warm the tortillas.  I chickened out at the last minute and did not put the spinach in with the eggs—but I will try it next time because I really love spinach. 


Taco Pizza

The Taco Pizza was amazing!  It turned out just like the picture (so I did not need to take a picture anyways).  The only thing I would do different is to remember to kind of toss the chopped tomatoes on a paper towel because it made the pizza a little wet in some places.  We did not have leftovers, but if you did, you would not want any sogginess on the pizza.


Outback Green Beans

I made the Outback Green Beans and they were very good.  This is a great recipe if you can get garden fresh green beans because store bought is just not the same.  I steamed my green beans and they would have been perfect if I had remembered to stir them in the steamer so they get the same amount of doneness all over.  Also, I would only make a half recipe of the sauce.  However, I imagine using the extra sauce on chicken for another meal would be delicious.


Forgotten Chicken

The Forgotten Chicken was very interesting.  The rice turned out beautifully.  However, I do not happen to like using Lipton Onion Soup Mix as a seasoning on top of the chicken as the recipe instructs.  It was too overpowering for me and I only used half a packet.  I believe using my own special seasoning blend would be even better because my blend brings out the best flavors in chicken and the two condensed cream soups have plenty of flavoring as well.  My own seasoning blend recipe can be found HERE but basically consists of salt, course pepper, celery salt, onion powder, and garlic powder.  I use it so much that it is kept combined in a shaker to use whenever I need.  This recipe will definitely be tried again with the minor change.  What a great way to use Minute Rice brown rice which is supposed to be healthier.  I also recommend this recipe as a comfort meal to take to someone.

 Skinny Slow Cooker Chicken

Skinny Slow Cooker, Chicken and Mushroom Gravy

The changes I made to Skinny Slow Cooker, Chicken and Mushroom Gravy was to use boneless thighs instead of skinless chicken breast filets.  I believe this change made the recipe even better than it already was, plus it was cheaper.  You could combine thighs and legs if you wanted to.  The herbs and spices with the oil (I used light virgin olive oil instead of canola) made the chicken so delicious.  When I make this again, I am not going to bother with the gravy.  The chicken makes its own wonderful broth and I felt adding canned broth and making a gravy was unnecessary.  I put the chicken and mushrooms on top of Minute Rice brown rice and the family gobbled it right down.


Slow Low Country Boil

The Slow Low Country Boil, (the one I forgot to turn the crockpot on for), was truly restaurant quality.  The cost was moderate and the meal was even better than a comparable one we had at Red Lobster a few weeks before!  I even found Red Lobster biscuit mix at Walmart and had my husband whip them up to go with the meal.  He never cooks and they turned out beautifully.  This is a fabulous meal.  We made it with frozen corn on the cob halves and just left them as halves, although they would have been prettier if I could have followed the recipe with shucked corn cut into four pieces.  Ya’ll definitely try this one because it would really impress guests!


Cheese Steak Sandwiches

One of my fav’s was the Cheese Steak Sandwiches.  Fall is a great time of year to figure this one out.  I am going to give a few more details because the pin does not have much.  I had never made cheese steaks before and was a little nervous.  The recipe calls for cheap steak and that is what I got!  Look at the pictures on the pin to get an idea what the steak should look like at the store.  Then slice it pretty thin, discarding the fat. 
I cooked it in its own juices with the onion and salt and pepper on medium heat until its own juices were almost gone and then I put the French onion soup in there and brought it to a boil, lowered the heat to medium-low, and put the lid on the pan.  Being Southern, I wanted to slow-cook the steak in the soup until the meat was very tender. 
I used two pieces of American cheese for each hoagie sandwich, doubling the cheese, and tearing in half so every part of the sandwich had cheese.  These sandwiches were going to be cheesy!  They were so good, I felt like such a glutton! 
My family said they were better than any restaurant sandwich they had ever had, and my daughter has actually been to Philly and had an authentic Philly Cheese Steak.  This is definitely a great meal for football fans.


Crock Pot Chicken Fajitas

Okay now for Crock Pot Chicken Fajitas.  I loved this recipe because it said you could use thighs.  I was skeptical and up to the challenge of trying fajitas made with thighs.  This recipe was out-of-this-world!  It made a lot and there was NOTHING left folks!  This is definitely the one to do for teenagers and guys—a really easy recipe for after church or Saturday college football in front of the tube.  

How have the recipes on Pinterest been working out for you?  I find most of them fairly reliable but I have also had my share of disappointments.  Let me know!


Monday, July 15, 2013

Quick Mix Sausage Balls

These sausage balls are so easy to make and because you can freeze them, you always have something delicious for last-minute company to chow down on or to take to any gathering.  The sausage balls shown is a before-shot.  

I like to use parchment which I use several times before throwing away (this recipe makes a lot).  I actually find that these sausage balls bake up even better after they have been frozen, if that makes any sense.  I do not know if it is because the mixture and flavors have had time to meld.  I now prefer to have sausage balls with any type of breakfast menu rather than sausage by itself.  It really makes the sausage go a long way.  I promise to remember to eventually have an after photo (I keep forgetting)!


My sausage balls are made with a homemade baking mix I like to call Quick Mix.  My Quick Mix recipe uses wheat flour so it is a little bit healthier! (Find homemade Quick Mix and other recipes found on My Quick Mix post).

Quick Mix Sausage Balls
3 cups baking mix
1 lb. hot ground pork sausage
10-oz. pkg. sharp cheddar cheese, shredded

Combine mix, sausage and shredded cheddar in a large bowl, pressing mixture together with hands.  Shape into 3/4 inch balls and place on lightly greased baking sheets (or use parchment).  Bake at 400 degrees F. for 15 to 18 minutes or until lightly browned.  Yield: about 8 dozen.  Sausage balls may be frozen uncooked.  Bake frozen balls at 400 degrees F. for 18 to 20 minutes or until lightly browned.

I collect "Quick Mix" recipes, or it's sometimes just called baking mix.  I have even heard it called Missouri Mix--it has many different names.  My original recipe comes from an old Southern Living Magazine.  But it is my goal to find as many different, useful, and delicious recipes to use with my Quick Mix as possible and would love to hear of any others out there, so please let me know!


Friday, June 14, 2013

Perfect, Easy Biscuits

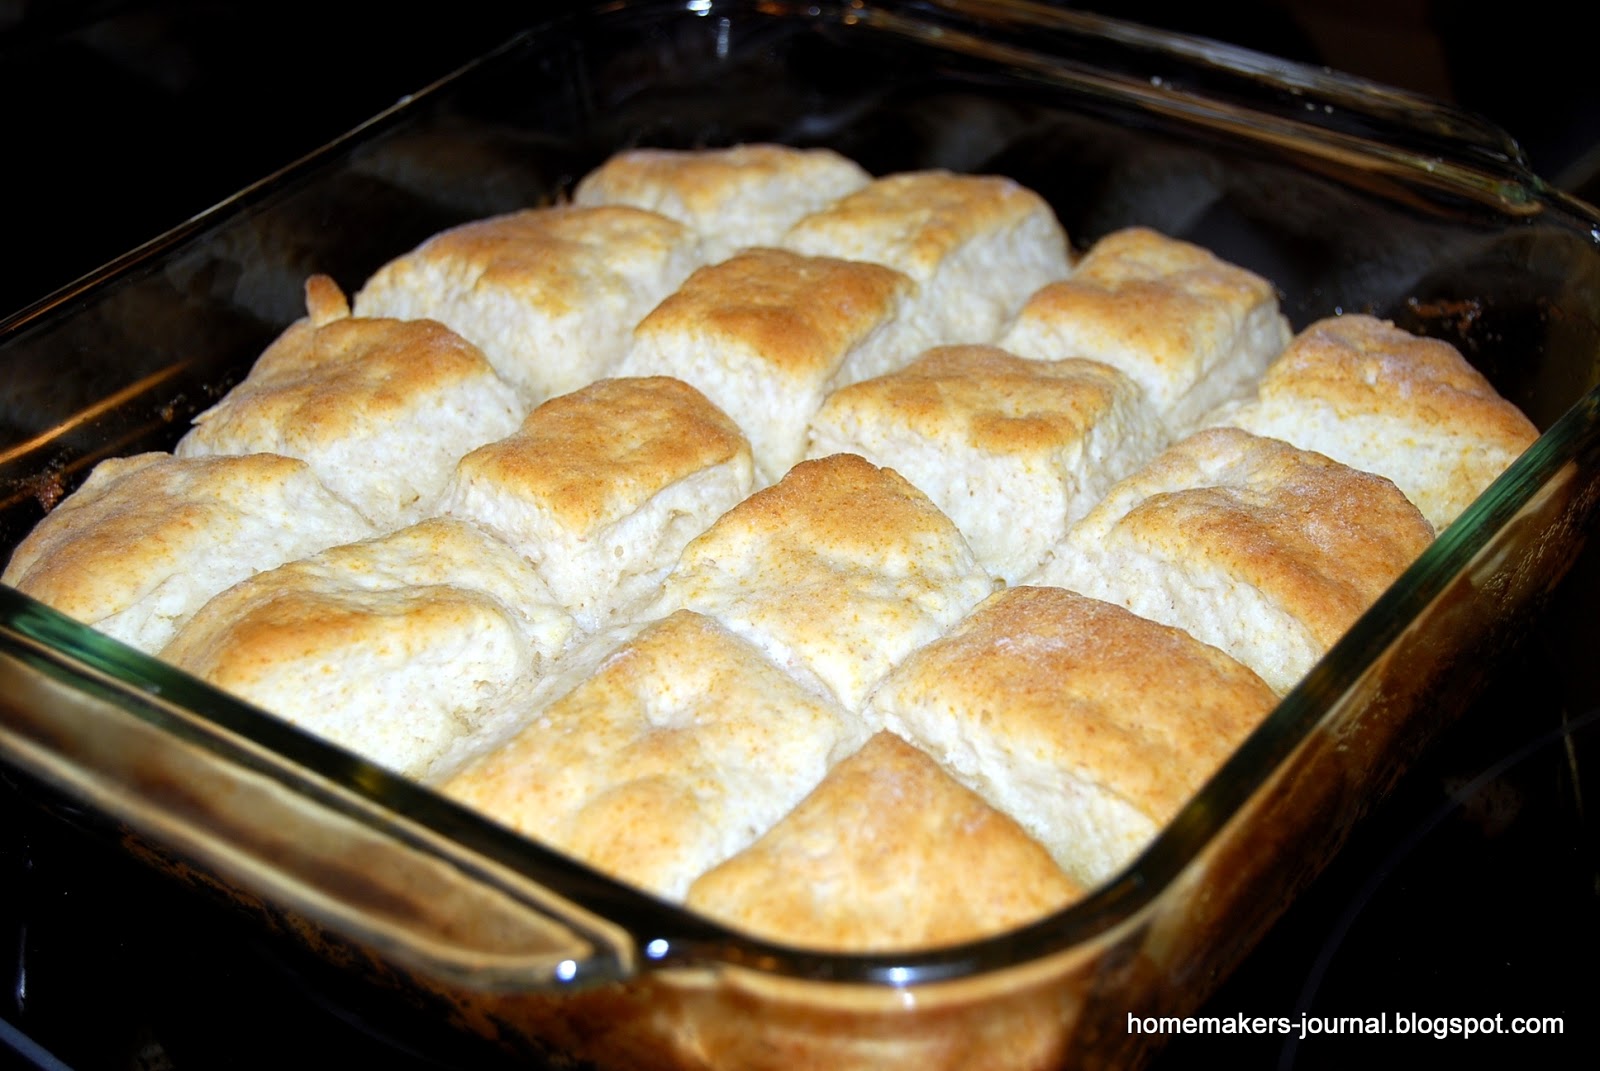
There are a few things that I think every homemaker should be able to do well, and one of those is make perfect biscuits.  I found a fabulous recipe for 7up Biscuits using Bisquick from www.plainchicken.com.  I was so excited to find this different and easy recipe using Bisquick since I make my own homemade version of a quick mix which uses wheat.


The recipe can be found and printed out at www.plainchicken.com.  I will describe the process adding some helpful hints for those who may be biscuit-making novices.

Step-by-Step Procedure

Heat the oven to 450 degrees F.

I go ahead and melt one-fourth cup of butter in my 9 x 9 inch pan in the oven.  Be sure to take the pan out when butter has melted so it won't brown.

Place two cups of Bisquick, or your own quick mix, into a large mixing bowl.  You can make a well in the center if you like and place a half-cup of sour cream (I like Daisy).

I actually work the sour cream gently into the Bisquick with my fingers until the sour cream has wetted most of the flour mixture thoroughly.

Then I pour 7 Up into a half measuring cup but more-than-likely, I will not use the entire half-cup.

Just sprinkle the 7 Up by Tablespoon over the top of the sour cream and Bisquick mixture.  Use a fork to fluff the 7 Up throughout the mix.

When most of the Bisquick has formed a ball in the center with just a little bit still hanging to the sides of the bowl, the dough is probably ready to gently knead together on a lightly floured counter.  The key is to use as little flour when kneading and only knead enough to be able to pat dough into a square.

Since I don't want to overwork my dough, I don't bother with the biscuit cutter.  I just pat the dough into a square slightly smaller than the measurements of my 9 x 9 inch pan (or 8 x 8), rather than use a rolling pin.

Use a sharp knife to cut into squares.  Then I place each square right onto the butter in the pan basically in the same exact way that I patted and cut it out on the counter.

Bake for 12-15 minutes, or until golden on top.  Cool in pan on a cooling rack (if they last that long!)  They are best served hot from the oven.

Baking Mix Recipes to Try

I like having the biscuits slightly connected so they are flaky and  moist.  This recipe is so good, the texture is almost like making yeast rolls.  This would be a great recipe for camp and cooked in a box oven!  My box oven instructions can be found at Homemaker's Journal, Easy Outdoor Cooking Recipes post.

For more delicious Quick Mix recipes see Homemaker's Journals beautiful and delicious Christmas Coffee Cake post and scrumptious Quick Mix Pancakes found at Some Favorite Campy Things, part 2.

I hope you enjoy this recipe as much as our family has.  I like to experiment with recipes using soda pop as an ingredient.  How do you use soda in your favorite recipes?

Wednesday, May 1, 2013

Nesting, It's A Chick Thing Book Review

Book Review, part 1:  Nesting, It’s A Chick Thing, by Ame Mahler Beanland and Emily Miles Terry.


Make it Your Beside Table Book

This book was a lot of fun to read.  I could see it being a great nightstand book in a guest room or displayed on the coffee table because you can pick it up any time and begin reading anywhere in the book.  It is kind of like a printed blog of posts, many of which are written by famous guest writers.  The book includes great quotes and recipes, interesting facts and background information, and whimsical vintage photos—all having to do with us “chicks.” 

Primping--it's A Girl Thing!

I plan on making time to try all the fun ideas on p. 223 “Preparty Primping.”  One idea was to try out several hand preparations, ending with 2 base coats on the nails, a pretty pink coat of nail polish, then use a toothpick and yellow and white nail polish to create daisies.  End with a top coat to protect the masterpiece!  Nails any garden aficionado would be proud of!

Gardening

Speaking of gardeners, a good handsoak after working in the garden consists of adding two drops of each to warm water:  chamomile, lavender and geranium essential oils.  After soaking your hands for 10 minutes, use a nail brush to remove any dirt that’s left under the nails.  Rinse thoroughly and pat dry with a soft, fluffy towel to seal in moisture.

The book recommends making a hand scrub to keep in a jar by the kitchen sink.  The scrub can be used to slough off the rough skin and stains from working in the garden.  As before, rinse with warm water and pat dry.  Combine 1 c. coarse salt, 2 drops peppermint essential oil, 3 drops lavender essential oil, ½ ounce sweet almond oil.

Soft-as-Daisy Hands

For soft-as-a-daisy hands, combine one tablespoon sweet almond oil and one-half teaspoon castor oil and add 2 drops of geranium and rosemary essential oils as well as 4 drops clary sage and lavender essential oils .  Massage hands with the oil using a soft towel to push back the cuticles carefully.  They recommend using cotton gloves (or white cotton tube socks), to keep hands covered overnight.  Be sure to rinse thoroughly with warm water—taking care to scrub the nails gently with soap to remove the oil—and pat dry.  

All of these ideas are a great way to have hands manicure-ready after a hard week of gardening!  However, the book was about a lot more than manicures.  This was what I was most interested in.  My next post is about Nesting, It's a Chick Thing, only I focus on a decorating trend I am really interested in.

I like the idea of leaving something fun to read for a guest in my home.  How do you fix up the guest room when you have a visitor?

Monday, February 18, 2013

Foil Packet Dinners

Served with just regular old Wonder Bread or buttery Texas toast, this is my go-to meal.  My 17-year-old son LOVES this rendition of barbecued chicken and so does my pocket book!  I like to collect foil packet dinners for camping, but I end up making this meal all the time ‘cause it’s so easy and inexpensive.  Instead of individual packets, I throw the whole thing in a large pan and wrap tightly with foil.  You can increase or decrease the portions as you like or use chicken thighs as well as legs.  Heck, throw in a few wings. 


My favorite inexpensive sauce is Kraft’s Spicy Honey BBQ Sauce.  I also like to cook the meal a full hour ‘cause a lot of us Southerners believe in slow-cooking our barbecue.  (You can turn the oven down a little if you like).  Try this hearty, finger-lickin’ meal and see if you don’t join our fan club!  P.S.  I never defrost the corn on the cob and it turns out great every time!

Are you a fan of foil packets too?  What are your favorite ways of using aluminum foil when cooking?

Barbecued Chicken in Foil printable
8 chicken legs                                                    2 T. butter, melted
4 small ears frozen corn, thawed                      ½ c. barbecue sauce
1 t. salt                                                               1 (15-oz.) can pinto beans, rinsed and drained
½ t. pepper                                                     
Toppings: barbecue sauce, shredded Cheddar cheese, chopped green onions
This recipe can be done as follows (which is great for campouts!) or when I do this at home, I put everything in my largest pan and wrap the top tightly with foil.  This recipe also doubles very well!
Tear off 4 (18 x 12 inch) sheets of heavy duty aluminum foil; lightly grease 1 side of each.  Place 2 chicken legs and 1 ear of corn in center on lightly greased side of each foil sheet.  Sprinkle evenly with salt and pepper; drizzle corn evenly with butter.  Spoon barbecue sauce evenly over chicken; top evenly with beans.  Bring together 2 sides of each foil sheet over ingredients, and double fold with about 1-inch-wide folds.  Double fold each end to form a packet, leaving room for heat circulation inside packet.  Place packets on a baking sheet.  Bake at 450 degrees for 40 minutes.  Carefully open packets to prevent burns from hot steam.  Serve with desired toppings.

Monday, January 7, 2013

How to Freeze Grated Cheese


Lately, I've been trying really hard to stick to a strict grocery budget--after all, when you purchase and eat food, what do you have to show for it?  I'd rather not waste money on food that might get thrown out.

However, it can be tough to purchase items for a two-week period and realize someone just made a snack with the cheese you needed for Thursday night's dinner, (especially when they could have eaten what you prepared for snacks!)  So I try to pre-prepare for my family's meals as much as possible.  

I have started using a permanent marker to label everything that goes into the pantry and fridge for a specific purpose.  That doesn't mean everything is labeled--just what absolutely cannot be used up before I need it.

I remembered that I can go ahead and shred my cheese and spread it out on plastic wrap on a cookie sheet and place in the freezer.  It only takes a few minutes to harden enough to place in a freezer bag and store in the freezer.  Shredding is a good job for one of the kids to do, but you might want to freeze it yourself to ensure it gets properly stored.


Zesty Tomato Soup is a fabulous last minute meal.  Just keep some frozen Monterrey Jack Cheese on hand and cans of tomato soup and some oyster crackers in the pantry.  It's seasoned with chili powder.  It really takes tomato soup up a notch!  I would serve this to last minute company or when having the girls over for lunch. 

Monday, October 1, 2012

Simple Oktoberfest Family Meal


This meal can be cooked over an open fire or right in the oven.  Be sure to use a pan to catch possible drippings if you cook in the oven.  A great way to enjoy a beautiful fall evening at home or camping.  Print Recipe

Simple Oktoberfest Family Meal
1 lg. sweet onion, sliced
3 lg. bell peppers:  green, red, and yellow
4 medium potatoes, sliced 1/2-inch thick
6 medium carrots, sliced 1/4-inch thick
1 small cabbage, sliced
2 medium tomatoes, chopped
1 to 1-1/2 lb. cooked Polish sausage
1/2 c. butter or margarine
1 t. salt
1/2 t. pepper
Place onion, peppers, potatoes, carrots, cabbage and tomatoes on three pieces of double-layered heavy-duty foil (about 18 x 18-inch).  Cut sausage into 1/2-inch pieces and add to foil; dot with butter.  Sprinkle with salt and pepper.  Fold foil around the mixture and seal tightly.  Grill, covered, over medium coals for 30 minutes.  Turn and grill 30 minutes longer or until vegetables are tender, (if you open bundles to check, be careful of steam escaping, and carefully fold back if more time is needed, so they don't leak).  Yield:  6 servings.

Monday, September 24, 2012

Rx for Houseplants

  • Leaf tips turn brown and lower leaves turn yellow and drop off:  Over-watering is the culprit.  Allow the soil to dry and water less often.
  • Leaf tips turn yellow, then brown before drying:  Under-watering--soak pot in water, then water more frequently.
  • Leaves look faded and are streaked with yellow or brown mottling:  Too much light--move plant to less intense light.
  • New growth is elongated, pale and undersized:  Not enough light--move to stronger light.
  • Leaves become yellowish, but veins are green.  Lower leaves drop off and new growth is weak:  Under fertilization--start a schedule of fertilizing.
  • The plant puts on new growth rapidly but the stems are weak and streaked:  Over fertilization--flush the buildup of fertilizer out of the soil by watering the plant several times in a few hours.
  • Leaf edges curl under and dry out:  Too high a temperature in the room--move to a cooker spot.
  • White cottony growth appears in crevices between the leaves and stems:  Mealybugs--dab each bug with rubbing alcohol.
  • Stems and leaves get tiny brown "warts":  Scale--gently scrape the scale off with a knife or fingernail.
  • Leaves get a mottled dusty look.  Eventually there are webs on the branches:  Spider mites--rinse foliage thoroughly with a lukewarm shower.  repeat each week, if necessary.


Monday, September 10, 2012

How To Care for Houseplants


After years of being too afraid to care for houseplants, I took the plunge.  I discovered that I have a black thumb as opposed to a green thumb.  Years later, after trial and error and still not getting it right, I decided to follow some instructions.  (Duh)  I learned that there were many things I was doing right, and some things I was doing very wrong :(

I knew that using good soil mixes for each type of plant is really important.  If you go to Walmart or Lowes, you'll see that potting mixes vary towards the type of plants you're trying to grow.  It's sickening how some folks can grow plants in anything, but that doesn't work for me, so I have to be careful with soils and containers.  Containers need drainage holes to drain water and allow air in to lower soil areas.

Besides saucers to catch runoff, I place soft knitted dish clothes under my plants to protect the furniture they are on.  Clay pots are porous and it's a good idea to liberally rub petroleum jelly onto the inside of the pot before filling with soil and plant.  Plastic and ceramic pots allow no air through so they are good for small plants where rapid drying is a problem.  Saucers for large floor plants can be purchased with casters that help them move easily.  Always clean old pots and planters really well before using them.  After cleaning with hot sudsy water, I even rub my pots with hydrogen peroxide to ensure that no diseases are left.

If the plant looks top-heavy or there are many roots coming out of the bottom of the pot, it's time to repot the plant to a bigger container or divide.  A plant wilting between waterings or undersized new growth is a signal too.  New leaves should grow to the same size or even bigger than older leaves.

When potting, a small layer of stones or pea gravel should be placed towards the bottom for proper drainage--a half inch for small pots or 1-3 inches for pots over ten inches in diameter.  Cover the drainage pebbles with a layer of potting mix and firm lightly with your fingers.  Fill to the level that will allow for the depth of the soil ball of the plant and a half-inch space between the soil surface and the rim of the pot.

Remove the plant from the old pot by turning the plant upside down and tapping the rim of the pot firmly against a solid surface.  Gently lift the root ball out by firmly pulling up on the trunk.  Center the plant in the new pot and hold in place with one hand while you add the remaining soil.  Firm the soil by lightly pressing downward with your fingers.

Water the soil slowly from the top, or set the pot in a saucer of water for an hour or so.  Let the plant drain and then place it in indirect light for a few days while it adjusts to its new home.  After that, move it into the amount of light that is right for it.

Repotted plants do well if they have not been moved to a pot that is too large.  If the pot is too large, the plant will spend its energy putting out new roots instead of new growth.  If the plant doesn't need repotting, it should have it's soil replenished yearly.  Remove top 2-4 inches of soil with a fork; avoid harming fragile feeder roots.  Refill with fresh soil mixed with slow-release fertilizer, and if desired, top with grit.

This is mainly what you need to know about houseplants.  I've had trouble with mealybugs and I'm writing a post on Rx for Houseplants next.  If only I had just studied up a bit, a lot of plants could have been saved.  But I'm renewing my effort to have beautiful, healthy plants that provide much needed oxygen for my home.

Monday, August 13, 2012

Vancouver's Best Salad and Jiffy Pizza Sticks


I was so excited when I tried this recipe because it reminded me so much of the wonderful salad and bread sticks my young children and I would get at a little restaurant in Vancouver, Washington.  We lived walking distance to the downtown area and would window-shop and stop in at our favorite restaurant.  One reason it was our favorite was that for five dollars, I could get a whole tray of bread sticks for the children and a small salad for myself.  Back then we only had $50 per week to spend on groceries so this was a real treat once in a while.

Vancouver's Best Salad Print Recipe
12 cups mixed salad greens (I like the spring or herb mix)
2 large tomatoes, chopped
1 large cucumber, chopped
1 c. mayonnaise
Dressing:
1 c. Thousand Island salad dressing (any will do)
2 T. milk
2 hard-boiled eggs, chopped, optional (dressing pictured above is without eggs but it's really good with eggs!)
In a large bowl, toss salad greens, tomatoes and cucumber; set aside.  In a small bowl, combine mayonnaise, Thousand Island dressing and milk; mix well.  If desired, gently stir in chopped eggs.  Serve over salad.  Store any leftover dressing in the refrigerator.  Yield:  8 servings or 2 cups dressing.

These are just like the bread sticks we got in Vancouver--only better because there's chopped pepperoni baked inside.
Jiffy Pizza Sticks Print Recipe
1 pkg. JIFFY Pizza Crust Mix
1/4 tsp. garlic and herb seasoning (I use pizza seasoning)
1/2 cup hot tap water (not scalding)
1-1/2 pkg. pepperoni slices, chopped (or less if desired)
1/2 cup mozzarella cheese, shredded
14 cup Parmesan cheese, grated
Butter Topping:
2 T. margarine or butter, melted
1/4 tsp. garlic and herb seasoning
Preheat oven to 375 degrees.  Grease one baking sheet.  Mix Pizza Crust, seasoning, pepperoni and mozzarella cheese.  Add hot water (1 tablespoon at a time) and mix well with a fork.  Spread Parmesan cheese onto flat surface; drop dough onto Parmesan cheese and knead cheese into dough (I like to do this on a wooden cutting board cause it won't stick).  Roll to 1/2 inch thick, cut into 1 inch bread sticks.  Place about 1 inch apart on baking sheet.  Bake 18-20 minutes.  Mix together butter topping ingredients.  After removing sticks from the oven, brush tops of sticks with butter topping.

Monday, July 23, 2012

Buttermilk Blueberry Pancakes

"...Almonzo loved light, fluffy, buckwheat pancakes with plenty of molasses...The three pancakes on the griddle were holding their bubbles in tiny holes near their crisping edges.  He flipped them over neatly and watched their brown-patterned sides rise in the middle.  The good smell of them mixed with the good smells of fried salt pork and boiling coffee..."  (The Long Winter, by Laura Ingalls Wilder, ISBN # 0590488198)

Just like Almonzo Wilder, homemade pancakes are one of my favorite comfort foods.  I grew up thinking you had to buy store-brand mixes to make pancakes.  For years I tried to make good pancakes without success.  Then I grew brave enough to try pancake recipes in my cookbooks.  Making pancakes from scratch was sooo much better than store bought mixes, even if it took just a little more trouble.

The key to making pancakes is to have a consistency of a cake batter when you're ready to pour out the mixture.  They can't be too thin or too thick--it should pour easily but not too fast.  As the tops get plenty of bubbles and the edges firm up a bit, you can turn the pancakes over.

My husband is a better fry cook than I am and flips pancakes perfectly.  I have forced myself to practice until my pancakes turned out just as good.  So practice does make perfect.

Also, it really helps to invest in a nice, long electric griddle because the pancakes turn out better (cooks more evenly) and you can make a bunch at once and get done faster.  (I would even consider bringing one to camp outs!)

This recipe comes from my Southern Living Cookbook (ISBN # 084871816X).  It mentions you can keep the batter in the fridge for up to a week.  It also includes a homemade syrup recipe.  The recipe calls for buttermilk but I mix up powdered buttermilk instead because it's easier for me to keep on hand than buttermilk.  You can add 1cup of blueberries (like the pancakes shown above) or chopped pecans to the batter.

Buttermilk Pancakes with Homemade Maple Syrup 
Print Recipe
2 cups all purpose flour
2-1/2 teaspoons baking powder
1 teaspoon baking soda
3/4 teaspoon salt
2 tablespoons sugar
2 large eggs, lightly beaten
1-1/2 to 2 cups buttermilk (2 cups is always too much for my batter; start with 1-1/2 cups and add more 1 T. at a time if needed)
1/4 cup vegetable oil
Homemade Maple Syrup
Combine first 5 ingredients; stir well (be careful not to stir too much or the pancakes will not be fluffy).  Combine eggs, buttermilk, and oil in a bowl; add to flour mixture, stirring just until dry ingredients are moistened.  For each pancake, pour about 1/4 cup batter onto a hot, lightly greased griddle.  Cook pancakes until tops are covered with bubbles and edges look cooked; turn and cook other side.  (Store unused batter in a tightly covered container in refrigerator up to 1 week.  If refrigerated batter is too thick, add milk or water to reach desired consistency.)  Serve pancakes warm with Homemade Maple Syrup.  Yield:  18 (4-inch pancakes).

Homemade Maple Syrup Print Recipe
1 cup water
2 cups sugar
1/2 teaspoon maple flavoring
Bring water to a boil in a small saucepan; add sugar and flavoring.  Boil 2 minutes, stirring constantly; remove from heat.  Serve warm, chilled, or at room temperature.  (Store leftover syrup in a tightly covered container in refrigerator.)  Yield:  about 2 cups.  (Per 3 pancakes and 1/3 cup syrup:  Calories 566; Fat 11.9g; Cholesterol 77mg; Sodium 612mg)

Monday, July 9, 2012

Freezing Blueberries


I love fresh-picked blueberries (as long as someone else picks them--ha, ha!)  Picking berries is something you should do with your children or grandchildren or friends at least once.  The great thing about blueberries is how well they freeze and how good they taste whenever you pull some out of the freezer to bake (or pop in your mouth!)

Blueberries should not be washed prior to freezing.  

They have a natural waxy coating that protects them when freezing, then rinse the berries before using in a recipe.  I rinse my blueberries after defrosting them in the fridge so I don't wash before freezing.

Spread them out evenly on wax paper on a cookie sheet in the freezer.  It doesn't take but about 15 minutes for them to be firm enough to put in quart-sized freezer containers.  Containers rather than bags will prevent the berries from getting squashed.  Whenever you need a handful, the berries are nice and loose and ready to use, or pre-measure blueberries for your favorite recipes before freezing.  In airtight containers, blueberries will keep up to a year in the freezer.

I place the amount I'll need in the refrigerator to defrost.  Then I rinse them gently in a strainer or colander under cold water.  This prevents your batter from becoming stained blue.  I use my frozen blueberries in pancakes, smoothies, and muffins.  Gently toss blueberries with a little flour before stirring them into batter to prevent them from sinking to the bottom of the pan.  The blueberries taste so fresh and delicious all winter long.

Here's some helpful tips:

To make a hands-free berry bucket, punch holes in a plastic ice cream container and thread a long piece of string through each hole.  Then tie the string ends and slip the whole thing over the head.  The container hangs down in front, allowing both hands to pick berries.

Blueberries should be picked when they are dry.  If there is dew or rain on them, they will get soft and not last as long after picking.

Be sure to pick deep-blue blueberries for the best flavor.

When purchasing already picked berries 

Look for fresh berries that are firm, dry, plump and smooth-skinned and relatively free from leaves and stems.

Berries should be deep purple-blue to blue-black; reddish berries aren't ripe, but may be used in cooking.

Stay away from containers with juice stains, which may be a sign the berries are crushed and possibly moldy; soft, watery fruit means berries are overripe.

Fresh berries should be stored covered in your refrigerator and washed just before using.  Use them within 10 days of purchase.

Monday, June 4, 2012

The Lady's Chicken Nuggets

Originally a Paula Dean recipe, this has become a family favorite!  These nuggets make a great appetizer, family meal or a filling snack.  This would also work well in a sack lunch.  They are best served warm.  If you make Paula's dip, do it first so it can be chilling and thickening up while you fix the nuggets.

Paula D's Chicken Nuggets (print recipe)
6 chicken breast fillets
2 c. crushed sour cream & onion chips (I use more than I probably should)
1-2 eggs
2-4 T. milk
1/2 c. butter, melted
Preheat oven to 350 degrees F.  Spread the crushed potato chips in a shallow dish.  Beat together the egg and milk in a shallow bowl.  Dip the chicken, (cut into 1-1/2 in. cubes), into the egg mixture and then dredge them in the chips.  Place the chicken nuggets on a greased baking sheet and DRIZZLE WITH MELTED BUTTER, (sometimes I forget).  Bake for 15 to 18 minutes, or until golden brown.  The chicken nuggets can be frozen after baking.  Serve with your favorite sauce, such as ranch dressing or honey mustard. 
Honey Mustard Dipping Sauce (print recipe)
3/4 c. mayonnaise
3 T. honey
2 T. yellow mustard
1 T. lemon juice
creamy style horseradish to taste
1 T. orange juice, more or less
Combine mayonnaise, honey, mustard, lemon juice, and horseradish; stir well.  This with enough orange juice to make a pouring consistency for dressing, or dipping consistency for dip.

Monday, May 28, 2012

How To Make A Compost Heap


Illus. by Marc Brown
Super Soil, from Marc Brown's Your First Garden Book (ISBN 9780316112178) (the author of Arthur series which is also PBS kids' show), is how I plan to do my compost heap from now on:
"Compost is rich organic matter.  When you add it to the soil it helps plants grow.  Use it for your gardens indoors and out as an extra boost.
1. To recycle waste and make compost, or super soil.
2. Dig a hole about 3 feet wide and 2 to 3 feet deep.
3. In the hole make layers of plant matter (vegetable scraps, grass clippings, and leaves) and soil.  It will become rich compost as the plant matter decays.
4. Check the hole now and then.  When the leaves and grass clippings have completely disappeared, dig in with your shovel and mix up the layers.  Your compost is now ready to use!

photo from Southern Living
You can get fancy with compost heaps, but it shouldn't keep you from composting.  I've had no problems just heaping my compost in a pile out of the way but not too far from the kitchen.  Living in the country, I take advantage of being able to burn trash such as boxes food comes in, I take plastics and metals to a recycling center, and I compost all my kitchen scraps.  This leaves very little for the trash man to carry away.  My daughter recently informed me that her carbon imprint at home was practically nothing, but is pretty bad at the dorms.  I'm not into "carbon footprints" but I like the way they recycled everything during World War II, had victory gardens and composted to enrich their gardens.  In fact, you can actually just place your scraps in empty garden beds over the winter and till over with a hoe.  It's pretty well decomposed by spring.

from Southern Living
Compost heaps should be placed somewhere out of the way and shady.  Mark a 6 x6 foot area.  I pile kitchen scraps, especially egg shells (not meat or grease), raked-up leaves (even better if you chomp them up first with a mower), grass clippings, wood ashes from the fireplace, and garden refuge.  Cover with an inch of soil and sprinkle with 1/2 cup of lime to keep odors down if necessary, but I don't have a problem with odors.  Add 2 cups of garden fertilizer and keep layering up to several feet.  Water often in dry weather conditions.  It helps to leave an impression on top to catch rain water or snow.  Turn pile with a pitch fork occasionally.  Add more soil to keep the heap from looking unsightly.  I read in article in Southern Living magazine where a man grew cucumbers in his compost heap, (it was surrounded by a circle of chicken wire that the cumbers trellised up).  Now that's something I've got to try!

Monday, March 5, 2012

Quick and EASY Bierocks


I decided to share my Desperized Bierocks (or bieroch) recipe for St. Patrick's Day even though this is traditionally a Germanic food.  It essentially has the same flavors as Irish-American Corned Beef and Cabbage--both are even served with mustard. Instead of corned beef, there's kid-friendly ground beef.  To stay true to Irish-American tradition, the dish could be served with a side of potatoes as well.  
Shredded carrots have been added to this mixture.
Desperize, meaning in desperation, is taking a complicated recipe and simplifying it for a busy schedule.  Bierocks, pronounced "brocks," is a simple meat pie.  Typically, the bierock is filled with cooked and seasoned ground beef, shredded cabbage and onions, then oven baked until the dough is golden brown.  Some variants include grated carrots.  My recipe (found in the newspaper 6-7 years ago), combines ground beef and angel hair cabbage in a crescent roll tart.  This makes a terrific finger food (also appetizer).
A little water in the empty spaces might help.
Desperized Bierocks
Use 2 muffin tins (12 openings) use outside 8 slots
2 T. oil
1 large onion (1 c. chopped)
1 lb. extra lean ground beef
10 oz. pack thinly shredded green cabbage (3 c.)
1/2 t. salt
1/4 t. black pepper
cooking oil spray
2 (8-oz.) cans refrigerated crescent roll dough (I prefer the buttery kind)
deli style mustard for serving if desired
Preheat oven 350 degrees.  Place in skillet with lid, onion and ground beef.  Stir and cook till browned and crumbled (6 minutes).  Add coleslaw, salt and pepper.  Stir and cook until wilted (2 more minutes).  Remove from heat.  Spray muffin pan.  Place wide side of each crescent triangle over the muffin tin opening, allowing the wide part of the dough triangle to dip into the tin, (may hang over edge).  Place 1/4 cup meat filling over each triangle.  Fold point of triangle over each other to enclose, (don't need to seal).  Place in oven uncovered, 8-10 minutes or until golden brown.  Serve immediately with mustard for dipping or swirl over tops.  Makes 16.  Yield 6-8 servings.

Create your own Pot of Gold Coins and play a fun game of Scavenger Hunt for Family Night this month.

Easy Meat Pies :0)

LinkWithin

Related Posts Plugin for WordPress, Blogger...