Showing posts with label primary. Show all posts

Monday, April 23, 2012

Mom Mix


I had the children hand these out to their mommies one year when I worked in Primary.  I think they're pretty cute!  The mix can be put in a simple baggie with the following attached:

Mom Mix
Marshmallows because you're a big "softy,"
Cheese crackers because you're "squarely" behind us,
Gummy bears because you're a teddy bear,
Peanuts because I'm "nuts" about you,
The Fruit Loops because you're so sweet!

P.S.  I recommend using Teddy Grahams instead of Gummy Bears, just change the wording to "Teddy Grahams because...".

HERE is an 8x10 printable of the Mom Mix poem.
Download This Printable

See also:

Tuesday, July 26, 2011

Clove-Studded Fruit


"Aunt Eliza had brought Ma a large red apple stuck full of cloves.  How good it smelled!  And it would not spoil, for so many cloves would keep it sound and sweet."  Little House In The Big Woods, by Laura Ingalls Wilder

Little House In The Big Woods is my most favorite of the Little House books.  I love the descriptions given of daily pioneer life.  Clove apples are a very simple craft to make with children.  They don't have to make a pattern at all, but some will want to and they smell wonderful!  They also taste very good too (after cloves have been removed).  I found a small bottle of cloves for little more than a dollar at the local store, though they can be quite costly--I had to shop around.  The number of cloves per child can be limited if necessary.  Handi-wipes would be good to have on hand since the fruit is very juicy.

Press the sharp point of each clove into the apple.  Push it in until only the head of the clove shows.  you may need a toothpick to help you get started.  Continue until the whole apple is covered with cloves, (you can limit the amount of cloves if necessary).  To display your apple, place it on a dish or in a bowl out of direct sunlight.  You can also make clove oranges and clove lemons the same way you make clove apples.  These taste great in hot cider!  (instructions from My Little House Party Crafts Book, ISBN 0439060052)

Our family hosted a Library Story Time and we did this fun craft.  To see the lesson plan go to my Christmas Traditions, part 3 post.

Saturday, July 23, 2011

Pioneer Rag Dolls

Christen and Elise's Rag Dolls
"But Laura was the happiest of all.  Laura had a rag doll.  She was a beautiful doll.  She had a face of white cloth with black button eyes.  A black pencil had made her eyebrows, and her cheeks and her mouth were red with the ink made from pokeberries.  Her hair was black yarn that had been knit and raveled, so that it was curly.  She had little red flannel stockings and little black cloth gaiters for shoes, and her dress was pretty pink and blue calico."

When we were studying about pioneers in our homeschool, we checked out so many books from the various local libraries.  I found one book (unfortunately I didn't keep the source), that had crafts for kids.  I remember the cover of the book had the cutest plates made from woven bread dough clay colorfully painted with flowers also made from the bread dough clay.  Inside were the instructions to make these dolls.  The girls were able to make the bowls and they did a great job, but I had to help them make the dolls.

I was in the process of taking pictures of their dolls for this post when Elise fondly reminisced how I had let the girls design their own dolls.  They chose the hair color and eye color.  Christen added a shawl from the scrap bag and fastened it with a pin from her Grandma Rosie.  I designed the little dresses myself keeping them very simple with tiny pin tucks at the neck.

My 15 yr. old son saw these dolls yesterday and rudely proclaimed them ugly :(  I said they were of a "primitive design" and were supposed to look like this!  In fact I followed the picture in the book freehand exactly as shown.  I've always thought they were very sweet and similar to Laura's doll, Charlotte, as described in Little House in the Big Woods, Chapter 4.  (I just remembered that my mom made a bunch of these simple rag dolls for a Relief Society fund raiser when I was a little girl)!

Basically, draw a doll figure on packaging paper or freezer paper, then cut out fabric.  (The pattern includes the head and the body, separately).  You stuff the head through the neck opening of the head, and the body through the neck opening of the body.  Once stuffed, sew head and neck together with a whip stitch.  (I used a 1/2 inch seam).  A knitting needle helped to push the stuffing into the arms and legs, etc. (Becoming Martha has a great rag doll tutorial that would work just as well probably!)

I used yarn in the desired color looping it around about a foot-wide piece of cardboard until it was enough to make a wig.  I carefully slipped the yarn off of the cardboard and used the sewing machine to make a seam down the middle of the yarn.  Fabric glue is applied to the head to keep the hair onto the doll's head. I used fabric paints to carefully paint a face (lightly sketch it out in pencil first).

I made the dress slightly bigger than the doll's pattern and sewed it together basically the same as the doll's but leaving the bottom of the dress and sleeves open and hemming neck, arms, and sleeves.  Even for a novice sewer like me, it was fairly quick and easy and the girls and I were happy with the results since they looked very much like the picture in the book.

Friday, July 22, 2011

Cornhusk Dolls

Landmark Park, Dothan, AL  2002
Members of our Junior Troop included my 9 yr. old daughter, Elise and 11 yr. old daughter Christen and a homeschool friend of Christen's.  Sidekick Bryce is working on his own cornhusk doll while the three girls demonstrate to other visitors of Landmark Park at a special event (probably Heritage or Harvest Days).  Between our homeschool group and Girl Scouts, we visited Landmark Park a lot!--usually free since we were doing some sort of service while there.  The following instructions Cornhusk Dolls can be found at Pioneer Days, by David C. King (ISBN 0439259398).

Cornhusks have a smooth side and a rough side.  Always keep the smooth side facing out.

  1. If the cornhusks are green, dry them until they are straw-colored.  Place between sheets of newspaper.  Store in a warm, dry place for 5 or 6 days, or until color turns.  (Can be found in produce section of grocery store or in craft stores).
  2. Cover work area with more newspapers (we used a plastic table cloth).  Soak dried husks in water for about 5 minutes before working with them.  This will make them softer and easier to shape.
  3. Remove all the husks from the water and shake the water out of them.  Cover the ones you are not working with, with a damp towel.
  4. Cut off the pointed tips of all the husks with craft scissors to make the shapes more alike.
  5. Form the doll's head by taking a large piece of husk and folding it in half.  Stuff 3 or 4 cotton balls under the fold.  Tie a piece of heavy thread (candle wicking is good) around the husk 1 to 2 inches from the fold to create a head shape (we actually used thin pieces of cornhusks to do this).  The ends of the husks will extend several inches below the neck.
  6. For the arms, cut a thin piece of husk about 7 inches long and wrap it around the 6-inch piece of wire or pipe cleaner.  Fold back the tips of the husk at each end of the wire.  Tie them with the thread at the wrists to form hands.  (You can omit the pipe cleaner/wire--they can be made without this).
  7. Slide the husk-covered wire between the two halves of the husk below the figure's head to form the arms, one on each side of the body.  Carefully bend the arms into any position you wish.
  8. Tie a piece of thread around the doll's waist.  Stuff 2 or 3 cotton balls between the husks to fill out the torso.
  9. For a full skirt, place 3 or 4 husks around the doll's waist, but point the husks up, so that they extend above the figure's head.  Tie the husks around the waist with thread, then fold them down over the tied thread to created the skin.
  10. If you would like, glue a little corn silk to the head for hair and use felt-tip pens to add facial features--eyes, eyebrows, nose, and mouth.  (I prefer not to do step 10 and leave them more natural).


making the skirt

how I like to leave the dolls

Here is the simplest version for making Cornhusk Dolls found in the Nov/Dec '98 CopyCat Magazine, p. 11.  See my post for homeschoolers or teachers of K-3rd graders: http://homemakersjournal.wordpress.com/2011/07/08/native-american-culture-activities-for-kids/indian0018/

Thursday, July 21, 2011

Yarn Dolls


The first time I ever saw a yarn doll was when I was in the first grade and my mom and sister and I went to a friend of my mom's for a Christmas get-together.  She had made these little dolls as Christmas tree ornaments in Christmas colors and crocheted little matching skirts for them.  She gave my sister and I a little doll and these adorned our tree for many years.  My mom probably still has these ornaments.

Directions:
Light-weight yarn, any color
4 x 4 inch piece of cardboard
Scissors 
Wind the yarn around the cardboard 12 to 20 times, depending on how thick you want your tassel to be.
Cut the yarn, and slip the end under the loops on the card.
Cut at 12 inch piece of yarn, and slip it between the loops and the card.  Tie the yarn in a tight knot to pull and hold the loops together.
Slide the loops off the card.
Tightly wind another 12 inch piece of yarn several times around the tassel, about one third of the way down from the top where your first piece of yarn is tied.  Tie in a firm knot.  This is the yarn doll's head.
Cut the loops of yarn at the bottom of the bundle, and trim the ends evenly.
Shake the yarn to fluff it.
Separate a few strands from each side of the doll to make arms by tying each arm with yarn about half-way down (wrap yarn around several times).  Trim each arm below where they are tied off.

Wednesday, July 20, 2011

Pioneer Handkerchief Dolls


"These are the perfect beginner sewing project for Brownie troops or for young 4-H'ers."

In the mid-1980's, when I was a young adult, I liked to go to local arts and crafts festivals.  The best one I ever went to was the Watermelon Jubilee in Ft. Deposit (Greenville), Alabama.  I bought an ink drawing by a local artist that I eventually framed, and a Handkerchief Doll.  I thought it was the most darling thing I ever saw.  I really didn't notice much about its construction until I read an article in the July 1992 Friend magazine by Judie Fordham.  She actually gave step-by-step instructions on how to make one.  This is something I wanted to share with my daughters as part of the many pioneer things I love.

Materials:
Man's large white handkerchief
1-1/4 yards, 1 inch wide colored lace or eyelet
a ruler
a  needle and thread the same color as the eyelet or lace
scissors
embroidery needle
pink and blue embroidery thread
stuffing
4 pieces of narrow ribbon 10 inches long
Sew a row of lace along one edge of the handkerchief.  Sew a second row slightly above the first.


On the opposite edge of the handkerchief, find the midpoint, then measure in 3-1/2 inches.


Embroider a pink French knot for the doll's nose.  Make two blue French-knot eyes 1/2 inch above the nose and about 1 inch apart.
Wad up enough stuffing to make a ball 2 inches in diameter.  To make the doll's head place the ball of stuffing under the face you just made, gather the handkerchief tightly around it, and tie it off at the bottom with a piece of double thread.  Tie a piece of ribbon into a bow over the double thread to make the neck.


Sew two circles of lace around the back of the head for a bonnet.  Make arms by rolling the handkerchief at each side of the head and tying in a knot, leaving 1: at each end for hands.


Make three bows out of the ribbon and sew them, equal distances apart, above the lace on the skirt.
The instructions for Handkerchief Dolls is found at the following link:
http://lds.org/friend/1992/07/handkerchief-doll?lang=eng&query=handkerchief+doll

Judie Fordham, "Pioneer Dolls," Friend, July 1992
When pioneer children were crossing the plains,
They didn't have cars, airplanes, or trains.
They walked beside wagons loaded clear to the top
With food, bedding, and seeds for the next season's crop.
There just wasn't room for a toy or a doll--
The wagons were filled with all they could haul.
So Papa's handkerchief became a new toy,
A cherished soft doll that brought lots of joy.
This cute little doll loves to play or just sleep.
She'll brush away tears if ever you weep.
So keep her close by--she's easy to hold--
And pretend you're a pioneer child of old.

HERE is an 8x10 printable of the Pioneer Dolls poem.


These instructions come from Kathy Ballard, "Pioneer Dolls 'Sew' Delightful for Small Stitchers," Country Woman, Jan/Feb 1992

Materials Needed (for one large and one small doll):
1/3 yard of white cotton fabric
Scraps of calico for skirts and scarves
Scraps of lace and ribbons for trims
Thread to match fabric
Knit-Cro-Sheen crochet thread or string
Small amount of polyester stuffing for head
Standard sewing supplies
Body:  Cut one 8 inch square of white fabric for small doll and one 12 inch square for large doll.  To form hands, tie two pieces of string or crochet thread on two adjacent corners about 1/2 inch from ends (see Fig. 1).

Head:  Place a ball of stuffing, the size of a Ping-Pong ball for small doll and the size of an egg for large doll, on fabric square, about a quarter of the way down from the top edge and centered between the hands.
Fold top of fabric over so it covers the stuffing completely; gather together under the head and tie with a piece of string (see Fig.2).  Pull arms out to each side and arrange, then bunch the rest of the fabric together under the arms and tie with another string (Fig. 2).
Skirt:  Cut out a 3 inch x 8 inch piece of calico for small doll and a 6 inch x 12 inch piece for large doll.  Hand-sew a gathering thread along one long edge of the skirt.
Pull up gathering thread and place skirt around doll beneath the arms, where the second string is.  Stitch top corners of skirt together in the back, securing the skirt to the doll at the same time.
Using two or three small stitches, hand-sew the bottom corners of the skirt together.  Trim away any of the white fabric that shows below the skirt.
Hat:  Cut a piece of lace that's long enough to fit over the top of the head, and sew it on for a hat brim.  Or make a scarf by cutting a 6 inch square for larger doll.  Fold fabric in half to form a triangle.  Place over doll's head and sew the ends of the scarf together under the chin.  Stitch to doll to hold in place.
Angel Wings:  For small doll, use a 2 inch wide of flat lace about 18 inches long for a piece of white fabric 2 inches x 18 inches.  Tie into a bow with 2 inch to 3 inch streamers and tack to back of doll just below the head.
Trims:  If desired, you can use lace to trim around the bottom of the skirt and tie scraps of ribbon around the neck waist or hands of doll.

Sunday, July 17, 2011

Flip Over Old Fashioned Games


The instructions for two games we played in my Children's Pioneer Day Event post are given below.  I also included more old-fashioned games and their instructions.  Of course these are games the neighborhood friends and I played as kids and I am not that old--so they have really stood the test of time.  I remember teaching them to my children and anyone else's kids that just happened to be around.

Duck, Duck, Goose Everyone sits in a big circle, with one person standing on the outside of the circle.  That person (the standing person) on the outside walks around the circle touching each person on the head, saying "Duck, duck, duck, etc."
When they decide to, the standing person touches someone's head and says "GOOSE!"  Then the person who has been "goosed" (the sitting person) jumps up and chases the other person around the circle before they get back to the "goosed" position and sits down in the circle.
If the sitting person catches the standing person, the standing person has to go again.  But if the standing person reaches the empty spot in the circle, the sitting person becomes the standing person.
This goes until everyone is tired of playing.

Button-Button, Who's Got the Button? Everyone sits in a circle, with one person standing.  That person puts a button between his/her hands (like they were praying) and you are basically trying to pass the button from the

Saturday, July 16, 2011

Children's Pioneer Day Event

Because I didn't Journal!!!  I don't remember why we did this activity indoors.  
I am not exactly sure where I got this wonderful idea.  On my Button Exchange Page, there are a few Mormon sites that this could have come from.  If there's time, it would be nice to use Activity Days (or Cub Scouts and Achievement Day Girls--whatever they call it now--the 8-11 yr-olds) for making invitations, homemade butter, posters for each camp, and learn the games ahead of time.  Then the older children can lead the younger ones in the games that are played at the Fort Laramie Camp.  We had a small group of children in our branch so I mostly used the help of parents.  I typed this program and left a space for names of folks who were helping (I asked ahead of time). It was no problem getting the children to dress up "old timey."  Putting a bonnet on a sister instantly turned her into a "pioneer woman."  A bandanna around the neck did the same for a brother helping with our program.  I always put down the time frame for each part of the activity to keep things moving so we don't go over time by much.  I included my materials list.  I like to keep a list hand so that I don't forget anything.  Butter recipes are included in an upcoming post:  Pioneer Children Recipes.

Nauvoo 10:00-10:05 am
The children are gathered together to begin.
"Brigham Young" (__________) tells about Joseph Smith and the mobs then a 'Missouian' comes and tells the Saints (the children) to leave.
"Brigham blesses (opening prayer) the "Locust Fork Company" and we begin our trek.

Sugar Creek Camp 10:05-10:15 am
The children gather round a "campfire."
They are offered a piece of Brigham Young's favorite candy -- horehound candy.
A pioneer sister (__________) tells about traveling on the plains:  "We traveled all day on the plains and if we could not get water, we traveled all night.  When we would camp, we gathered buffalo chips and wood where we could, and built our fire and cooked a little bacon.  Then the boys would get their fiddles and we would clear off the brush and dance and sing songs.  Then we would sing hymns and have prayers and go to bed.  We had to make our beds right on the ground, and if in the morning when we woke up there was a snake in bed with us, we'd just kick it out."

Winter Quarters Camp 10:15-10:25 am
Another pioneer sister (__________) offers the children a taste of horseradish.  They learn that it was used to cure scurvy, a sickness from not getting enough vitamin C.
The children taste homemade butter and bread.
She tells about pioneer cooking:
"Bread was mixed in a home-made wooden bread tray in the morning and placed in the wagon to rise during the day as they traveled along.  When camp was reached in the evening, it was baked in one of the rock ovens built by the previous pioneers.  Cows made the entire journey and furnished milk and butter for the family with some to spare for others.  The milk and cream not used immediately were put in a tightly covered wooden churn and fastened firmly inside the wagon; the butter was already churned when they reached the evening camp."

Chimney Rock Camp 10:25-10:40 am
The wagon master (__________) tells about pioneers eating dried prickly pear cactus and gives a taste of dried apples.
He tells about the Goodridge family:
"In Captain Hardy's camp there was a family by the name of Goodridge, father, mother, several young girls and an 11-year-old boy.  They were a musical family, full of fun and made the best of most every situation.  The girls sang and danced; they gathered berries on the way; they laughed.  But they also counted the graves and wondered about the sadness and hardships of the travelers and wept for those who had died along the way.  They helped nurse the sick, washed and mended, cooked and carried water; they knew how to work.  When necessary, they would wade streams without complaining, shake the dust out of their clothing without resentment and gather buffalo chips without disgust.  They could fall on their knees night and morning and thank their Heavenly Father for their health and strength, their safety, their food and clothing, and the boundless sea of grass that paved their way to freedom..."
Brigham Young tells the "pioneers" they are too discouraged and cannot leave until they sing a song to lift their spirits.  So as they leave (walk around the property) towards the  next camp, they sing pioneer songs (i.e. Pioneer Children Sang as They Walked, The Handcart Song, and Come, Come Ye Saints).

Fort Laramie Camp 10:40-11:10 am
The school-teacher (__________) tells about the work the children did:  "boys helped the family to find food, and sometimes using the slingshot or a gun, brought home a rabbit or squirrel for dinner.  They would tend the animals and drive the wagons or pull the handcarts.  Girls helped gather wood and buffalo chips for the fire, they would help make food and tend to the younger children.  The pioneers walked 1,297 miles!  Sometimes they carried a brother or sister because they were too tired to walk and there was no room in the handcart."  (Have a child try to carry a sibling about 20 feet).  But pioneer children also found time to play some old-fashioned games."
(Lead the children in games such as, Button-Button, Duck, Duck Goose, Spin-the-Bottle, Mother, May I?  and Pioneer Laundry Race.  These games and more are found in the next post Pioneer Games.)
The children taste jerky and drink lemonade.

Salt Lake Valley Camp 11:10-11:25 am
A pioneer sister (__________) tells about the seagulls and the crickets:  "It was June and the Saints were struggling to plant crops in the Salt Lake Valley...they planted rows and rows of corn and vegetables.  The crickets covered all the crops and were eating everything green.  First they tried to drown crickets with water, but it didn't work.  So then they got sticks and clubs and tried to kill the crickets.  As soon as the sun came out the next day, the crickets came out again in more numbers than before.  When almost all hope was lost the seagulls came from out of the sky, swooped up the crickets and took them away."
The children plant crops (seeds in egg cartons--cut each opening so that it makes a little bio-degradable container that can be planted directly into the ground).
"Brigham Young" arrives and declares this is the right place, blesses the "crops" and offers a closing prayer.
As the children leave, we give them an old-fashioned peanut butter cookie.

Materials List:
Invitations
Homemade butter
6 camp posters
Horehound candy
Wheat bread
Peanut butter cookies (I used Archway Molasses Cookies)
Button
Bottle
Egg cartons (biodegradable)
Potting soil
Bean seeds
Plastic spoons (to fill cartons with soil)
Horseradish
Dried apples
Jerky
Lemonade
4 buckets
Two boards
Campfire wood
Photographer __________

Thursday, July 14, 2011

Book Review: Sarah, Plain and Tall


ISBN 0618062416
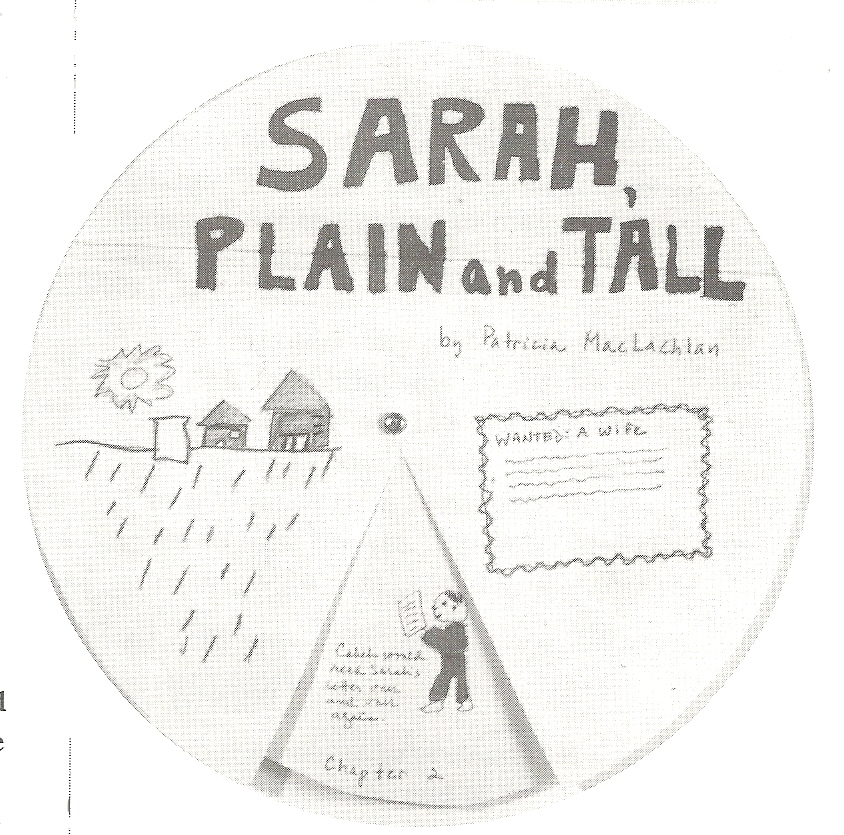
At the height of homeschooling where all three were being taught in our home by me, I became very passionate that all of my associations with children, whether homeschool, Girl Scouts or children's church activities be given my best efforts.  In this environment, it was really easy to take each activity and plan it as carefully as I would a homeschool lesson. 

Many would probably feel that doing a book review with 16, 8-11 year old girls as a weekly church activity would be going above and beyond.  However, I was familiar with a really good resource (listed below) that I was using with my older children to study Newbery Award winning books (I'm picky about these because some are just down-right depressing!)  This made planning a series of book-review activities relatively painless.  Not all the girls were on board, however, since reading was involved.  This book could be read in one sitting by an 11 yr. old.  The younger girls and their moms were more receptive!  

We actually did the above pictured chapter review and I think we watched the movie.  The book was covered over 3-4 weeks.  You may not be able to do all the activities in a weekly environment--I chose the ones that would fit our group of girls the best.  But homeschoolers and teachers of this age-group might want to try all of the activities.  I also highly recommend the Kirsten series and teacher's guide.  My younger daughter and I really enjoyed doing these activities together.


Teaching With Favorite Newbery Books, Lori Licciardo-Musso ISBN 0590019759


Tuesday, July 12, 2011

Pioneer Children

by Sandy Halvorson
Sometimes when I must walk to school, it seems a long, long way.
I get to feeling tired and would like to stop and play.
But then I think of pioneers who walked by sun and star;
And suddenly my little walk doesn’t seem so far.
Sometimes on cold, dark winter nights I crawl beneath the sheet
And wish I had a cozy place to warm my chilly feet.
But then I think of pioneers who camped outside all night
And only had a fire’s glow to give them warmth and light.
Sometimes when I am hungry and want something good to eat,
My mother gives me carrots when I’d rather have a sweet.
But then I think of pioneers who thanked God and were glad
For anything at all to eat—my carrots aren’t so bad.
Sometimes when I have chores to do and I would rather play,
I think of pioneers and know they worked most all the day.
And so I guess I can’t complain about things that I must do,
For when I think of pioneers, I’m very blessed—aren’t you?
http://lds.org/friend/1983/07/i-think-of-pioneers?lang=eng

Here is a real story of just one of the thousands of pioneer children who migrated west in the late 1840s and early 1850s.  This is a good one to tell children at a Primary pioneer activity, or a pioneer-themed family home evening.  It would be fun if a dad or granddad could dress up for the part and tell the story as if  he were Albert reminiscing when he was one of the pioneer children.

"Children Pioneers," by Fay McCracken, Friend, July 1995

LinkWithin

Related Posts Plugin for WordPress, Blogger...